KLA allows you to define and modify custom metadata files. This tool helps you to ease the process of finding existing metadata files, creating, and editing custom metadata.
In addition, this tool helps the configurator to see KLA configuration path indicating if they are custom or default (read-only), filter them by language and framework, and search by class, method, and function.
This configurator guides you with tooltips, examples, and any checks or necessary validations. It shows you the process of adding all mandatory elements and attributes.
Types of custom metadata files
Custom metadata files can be configured at three levels. These levels are in order of precedence, the higher ones take precedence over the lower ones. Review Precedence and scope of configurations.
For more information about metadata details and definition, review Custom Neutralizations.
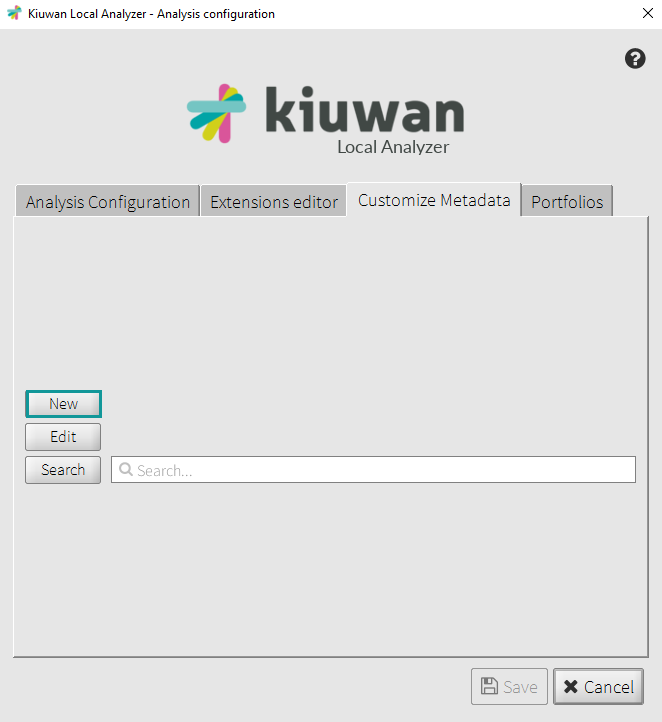
Create a new metadata file
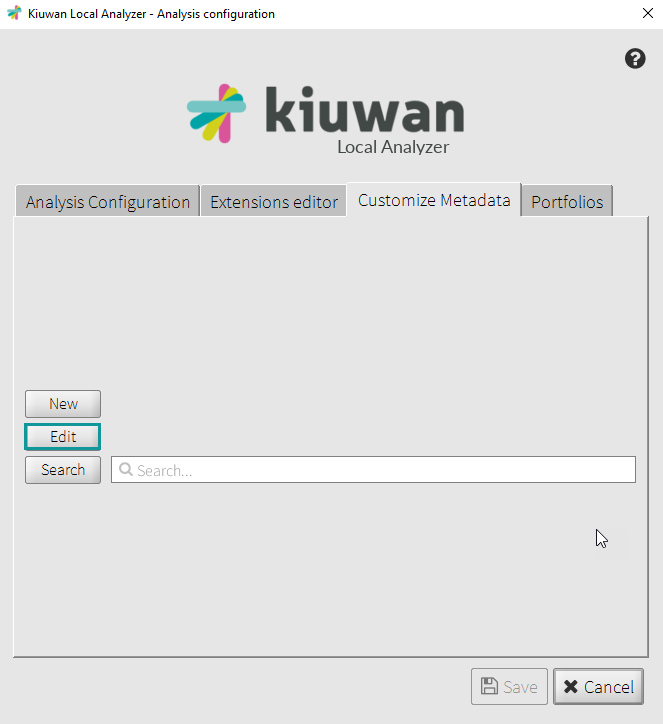
In the Analysis Configuration, click Customize Metadata, and select New.
Create a new metadata file by selecting the specific scope for your file, choosing the location, the language, or the associated programming language with the file, and typing a name for the file.
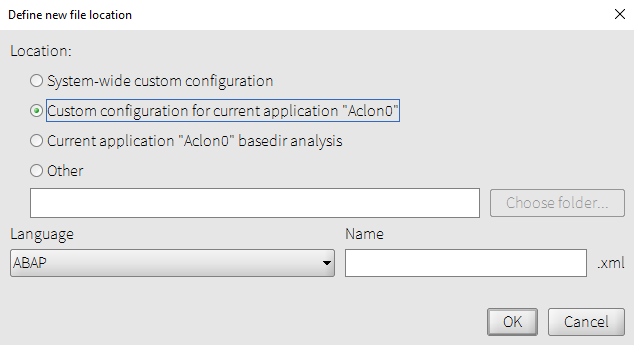
Below, find more information about the parameters when creating a new metadata file.
- Location
Select a location for saving the new metadata file.- Custom configuration for current application: Select this location to save the metadata file in the folder where the custom configuration files for the current application are stored
- Current application basedir analysis: Select this location to save the metadata file in the folder identified for the current application's basedir analysis
- Other: Select this location to save the metadata file in the folder of your preference.
- Language
Select from the drop-down list the language to associate the files to a programming language. Name
Specify a filename for the new metadata file. Notice that all metadata files are saved as XML, and they should follow the correct format, for example:metadata_custom_<framework-name | library_name>.xmlIf you do not add content, the metadata file will not be saved.
Custom Configuration for Current Application
After adding all the information above, click OK to open the Custom configuration for current application dialog. This dialog shows the files in two main views: Tree View and Raw XML.
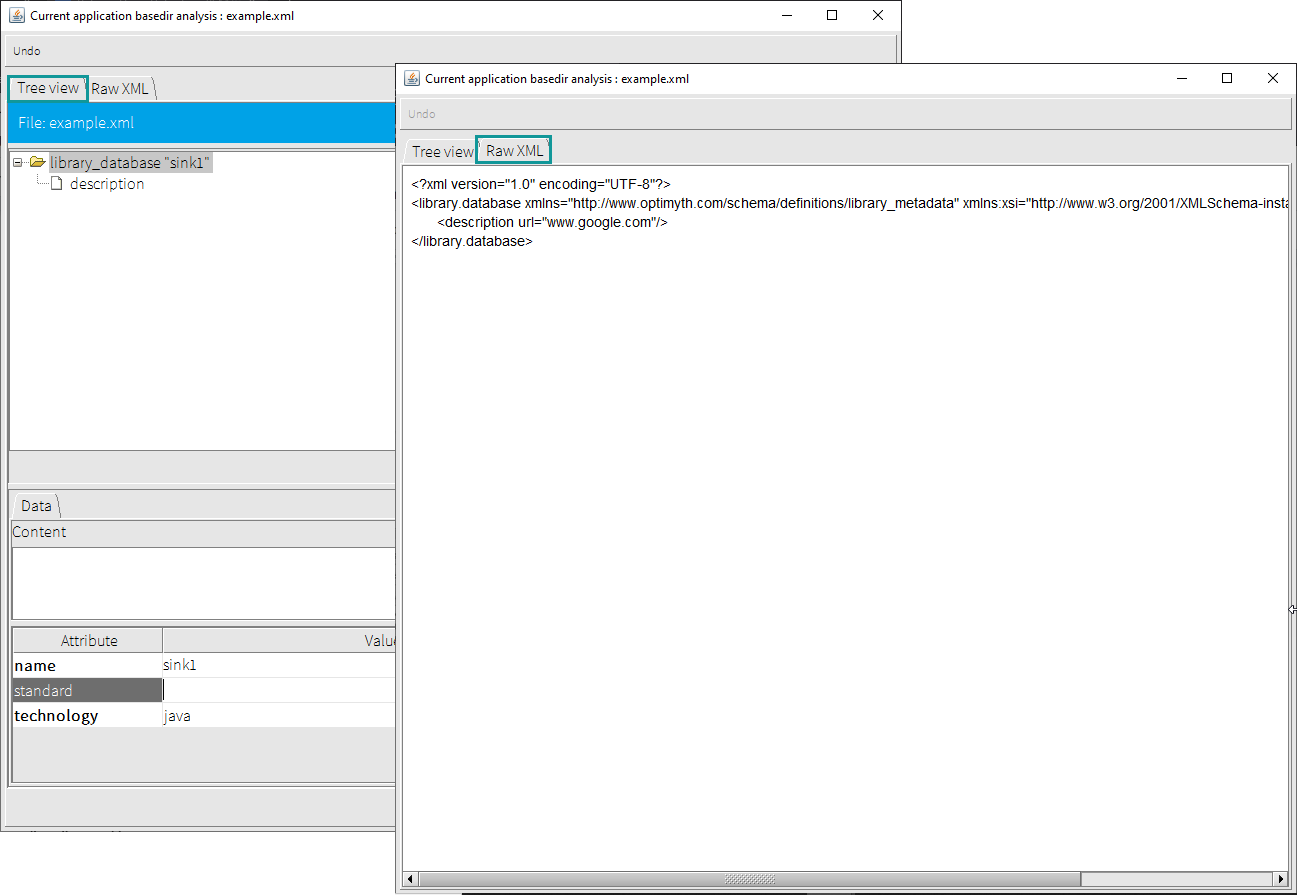
Other options in this dialog allow you to perform the actions described in the table below:
| Name | Action |
|---|---|
"Tree View" | Default hierarchical display of the metadata items in the file. |
"Raw XML" | Display of the metadata in XML format. |
Filename text box | Type a string to search and view the number of occurrences of the specified string. This can be a token - class, method, and function. |
< or > | To go to the previous or next occurrence of the string. |
Add | To add an entry |
Delete | To delete an entry |
View "Documentation" and "Examples" | To ensure that you make a well-informed and correct metadata entry in the file. |
Undo | To ignore the changes, you have made. |
Add an element
To start adding your elements, click Add in the Tree View tab.
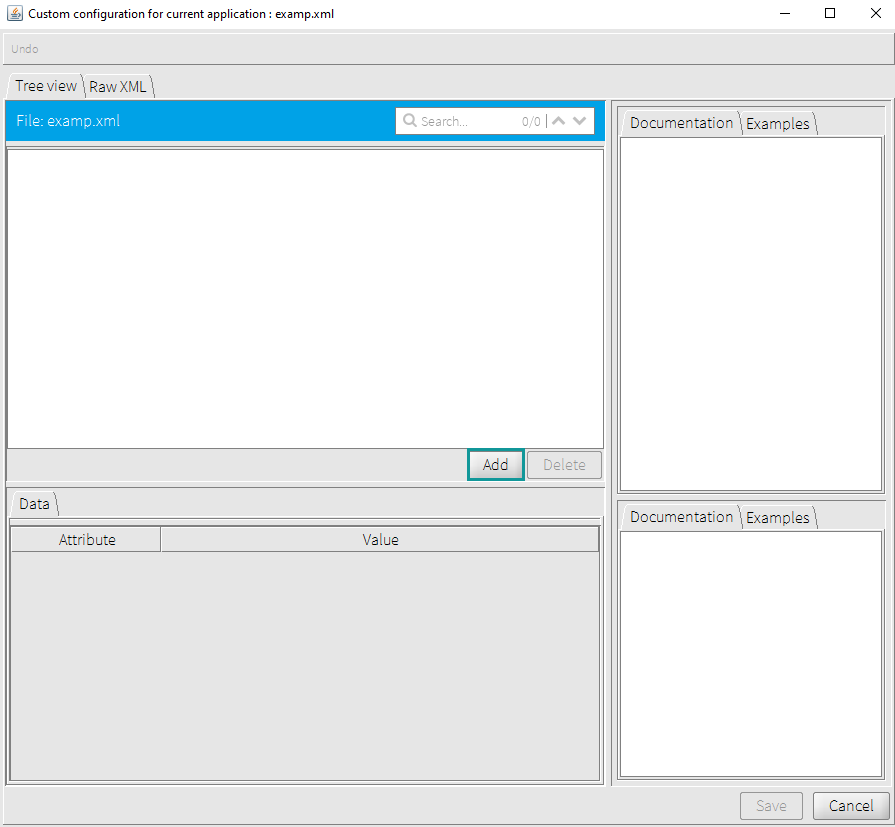
When the Add element dialog displays, select an element, and click Add.

Add Another Element
Click Add in the dialog to add another element to the file.

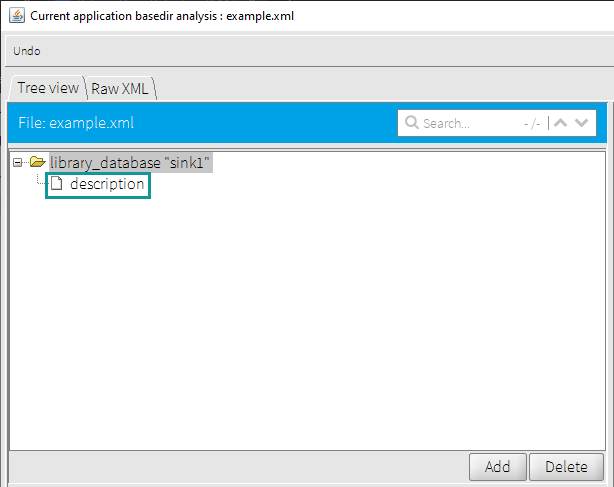
This example shows the available elements for /library that can be defined in the metadata file.
To add the description element to the XML file, select the element, and click Add. The element displays in the main tree view.
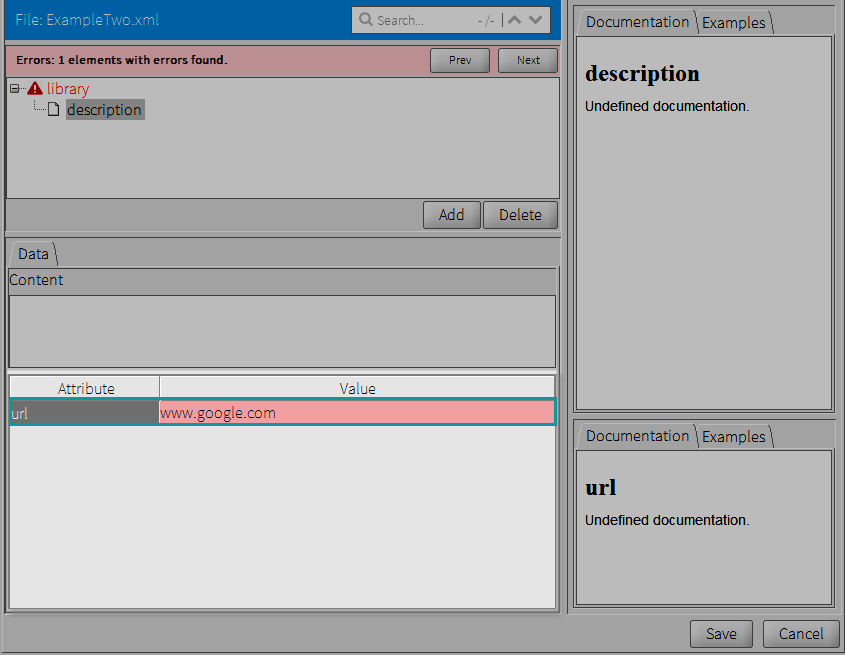
Define the attributes of an element
You can define the attributes by adding the value which is located next to the attribute name and clicking Save.
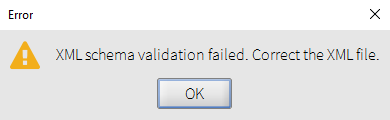
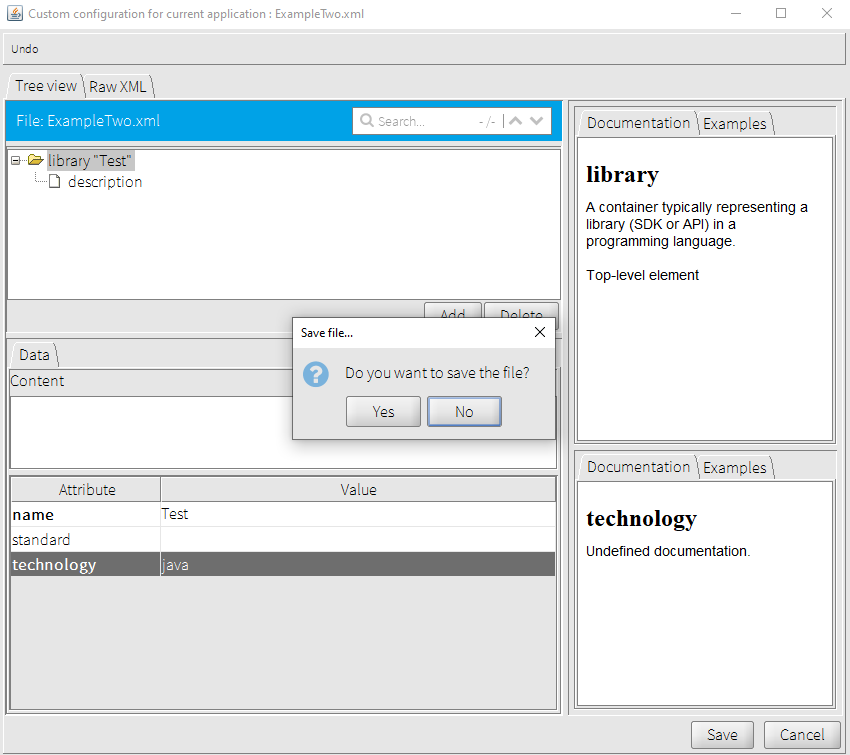
It is important to verify your element status and values to save your changes; otherwise, you cannot complete the action and the following message displays:
Also, the metadata editor shows the errors until the mandatory attributes are filled. These errors are flagged by a message as well as an alert icon.
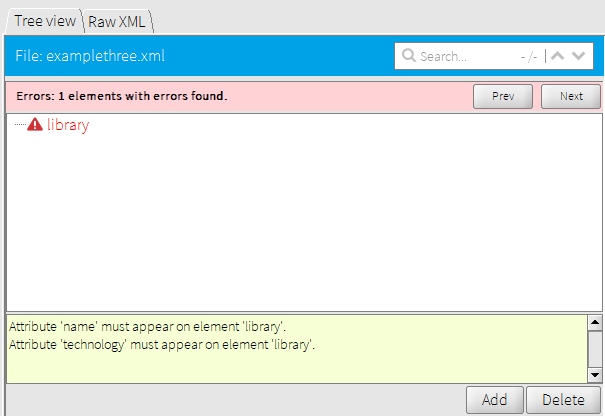
This example shows that the item library is invalid because some mandatory attributes have not been filled. The item "Library" is invalid because it needs the required attributes: 'name' and 'technology'
Save the new file
When you finish adding elements with the correct values and attributes, click Save, and click Save once more on the confirmation message to complete this action.
In addition to adding other elements, you can copy and paste them in a different location
Open and right-click the element you want to copy and click Copy.
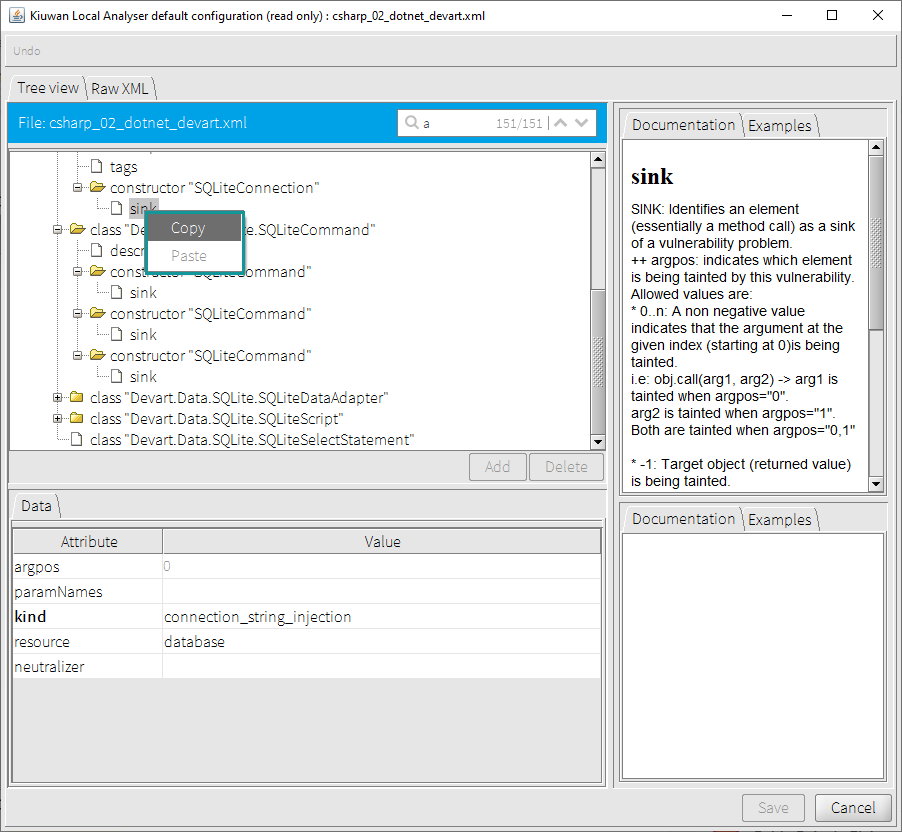
Open the target file and select the element where you want to paste it.
Edit a Metadata File
Kiuwan Local Analyzer allows you to edit your custom Metadata Files. The edited custom metadata files are saved in XML format in your selected location.
In the Analysis Configuration dialog, click the Customize Metadata tab, and select Edit.
Set the location of the files to be edited, filter them by language, and other options. Below, find more information about the parameters when editing a metadata file:
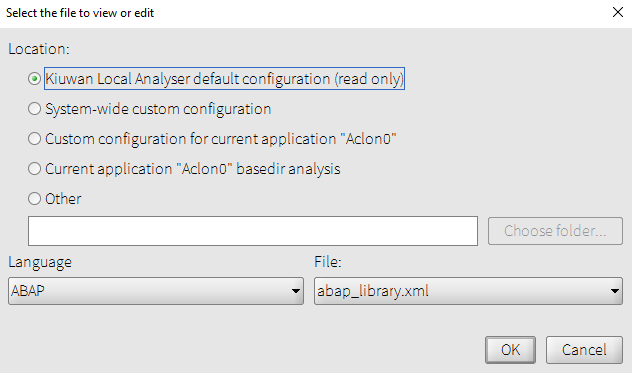
- Location
Set the location of the files you want to edit, the available options under this criteria are the following:- Kiuwan Local Analyser default configuration (read-only): View the content of the files in this location and use them for analysis purposes.
- Systemwide Custom configuration: View and edit the related files.
- Custom configuration for current application: View and edit the files in this location.
- Current application basedir analysis: View and edit the files in this location.
- Other: View and edit metadata files in your available folders.
- Language
Filter your metadata files by language and select from the drop-down list the language associated to your file. - Name
Lists all the metadata files under your filter criteria.
Select this location to save the metadata file in any folder of your choice.
Search
This feature eases searches at multiple levels to locate specific data.
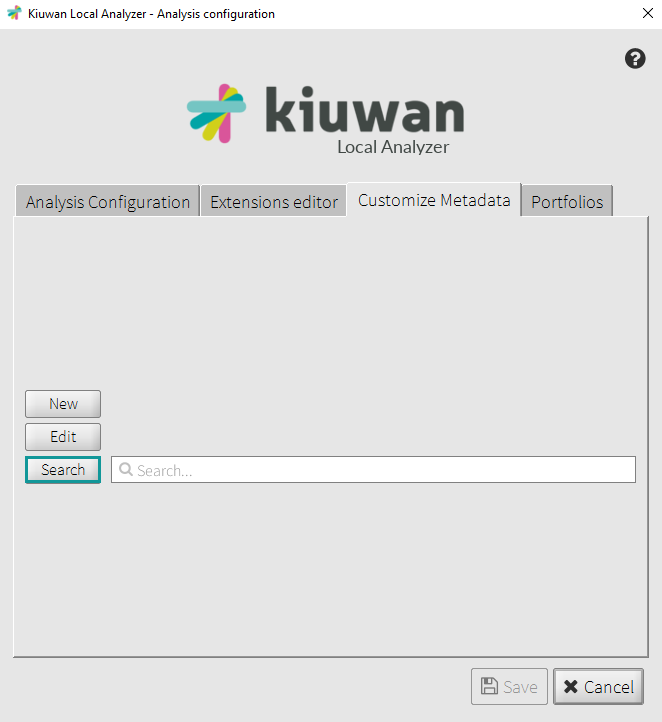
Under the Customize Metadata, the Search option gives the result of your performed search:
- Type a search value in the Search for box and click Search. The entire tree view of files is shown
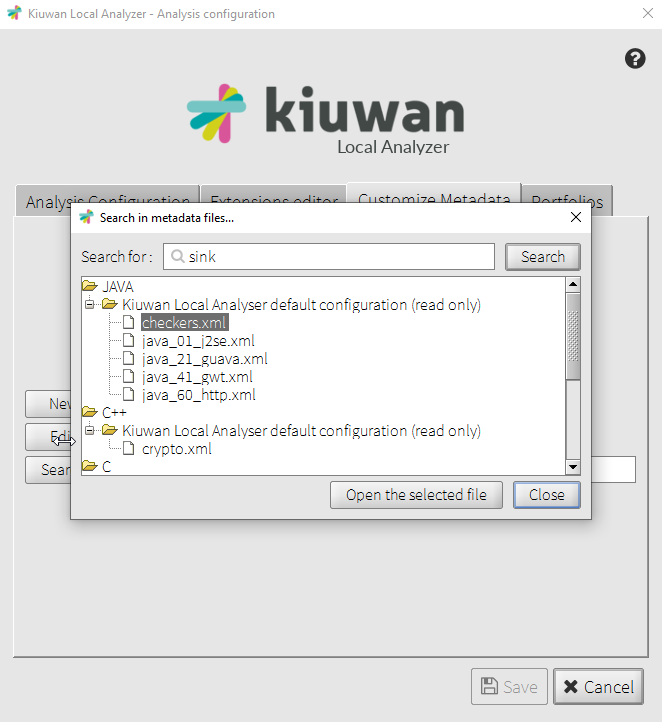
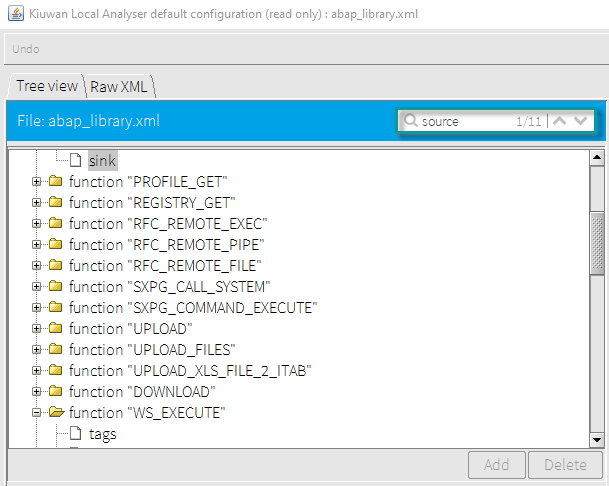
Once you selected the file, click Open the selected file to display the results on the Tree view/Raw XML dialog.
The search field shows the number of results found for your search, use the two arrows (next and previous)  to browse among your results.
- Enter the name of your file and click Search. This action opens up the Tree view/Raw XML dialog of the file where you can edit the values of the attributes, or add other elements. Otherwise, for Kiuwan Local Analyzer default configuration, the file opens in read-only mode.
When editing or searching a file, it is possible to have several Tree view/Raw XML dialogs open at the same time.