This guide will help you execute a custom rule analysis in Kiuwan Analyzer.
Contents:
If you need more information on programming a rule, please check the Getting Started with Rule Development page.
Prerequisites
For rule development you need the following prerequisites:
- A suitable Kiuwan account for developing rules.
- Kiuwan Local Analyzer (including Kiuwan Rule Developer)
- If you have already downloaded the analyzer, but you cannot find a development folder, please upgrade or reinstall the Kiuwan Local Analyzer.
- Java 8 (64 bits) or above (JDK or JRE)
- Your preferred code editor (Eclipse, iDEA, Vi, Emacs...)
Step 1: Preparing your IDE
The rules that Kiuwan executes are created using the Java language. A Kiuwan rule is composed by:
- A rule definition: an XML file where the rule metadata is kept.
- The rule source code, which contains the Java code that will be executed when running the rule.
In this section, we will create a Java project in Eclipse that will contain both parts of the rule. We will use for this guide the Eclipse Luna Standard, but you can use any Eclipse version or any other IDE or editor you like following an equivalent process:
- Create a new Java project choosing File > New > Java Project...
- Choose a name for your project.
- Set the Java execution environment to JavaSE-1.8.
- Click Next.
- Configure the project libraries needed to create Kiuwan rules:
- Go to the Libraries tab.
- Click the Add External JARs... button.
- Go to the folder where you installed Kiuwan Local Analyzer (AGENT_HOME) and click on the lib.engine subfolder.
- Choose the analyzer.jar and the spring.jar files.
- Once the jar files are added to the libraries, click on the analyzer.jar drop-down icon so the jar configuration can be seen.
- Select the Javadoc location entry and click Edit.
- Click the Javadoc in the archive and then the External file radio buttons.
- Click Browse.. and look for the AGENT_HOME/development/doc/javadoc/analyzer-javadoc.zip file
- Click Open and then OK.
- Click the Finish button in the New Java Project wizard to end the project configuration.
- Once the project has been created, create a new folder called definitions under the new project. We will use this folder to store the rule definitions created by Kiuwan Rule Developer.
| Step | Screenshot |
|---|---|
| 1. | 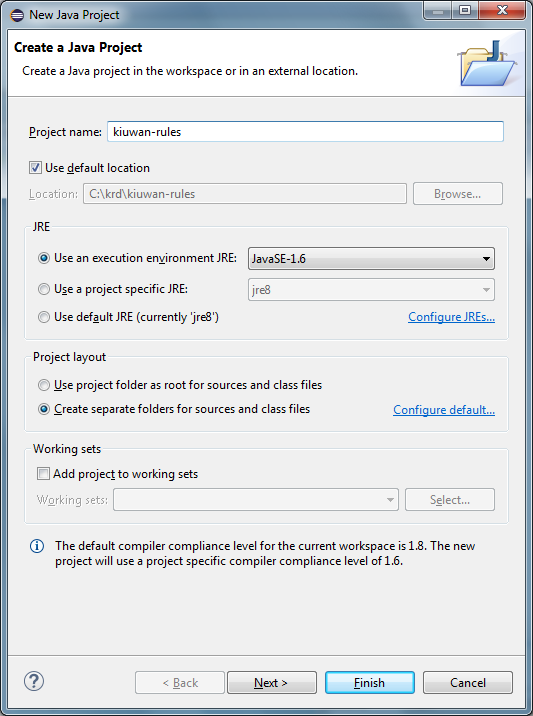 |
| 2. | 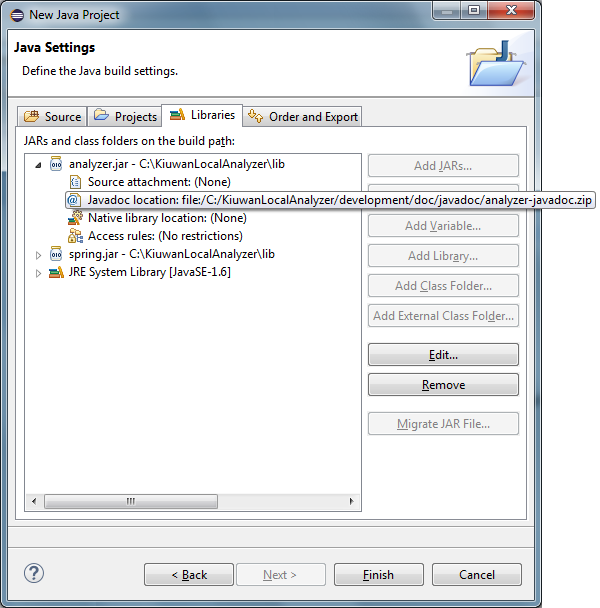 |
| 3. | 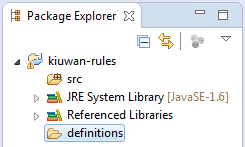 |
This is all that we need in the IDE part. Now we will launch Kiuwan Rule Developer and work simultaneously with both tools to create rules.
Step 2: Set up Kiuwan Rule Developer
The Kiuwan Rule Developer is a GUI tool that will help you create, run and edit rules that can be executed in a Kiuwan analysis.
Once you have installed or upgraded Kiuwan Local Analyzer, follow these steps to run Kiuwan Rule Developer:
- Run the software
- In Windows, double-click the script located in AGENT_HOME/development/rdev.cmd.
- In Unix OS, execute the AGENT_HOME/development/rdev.sh script,
- Enter your Kiuwan account username and password.
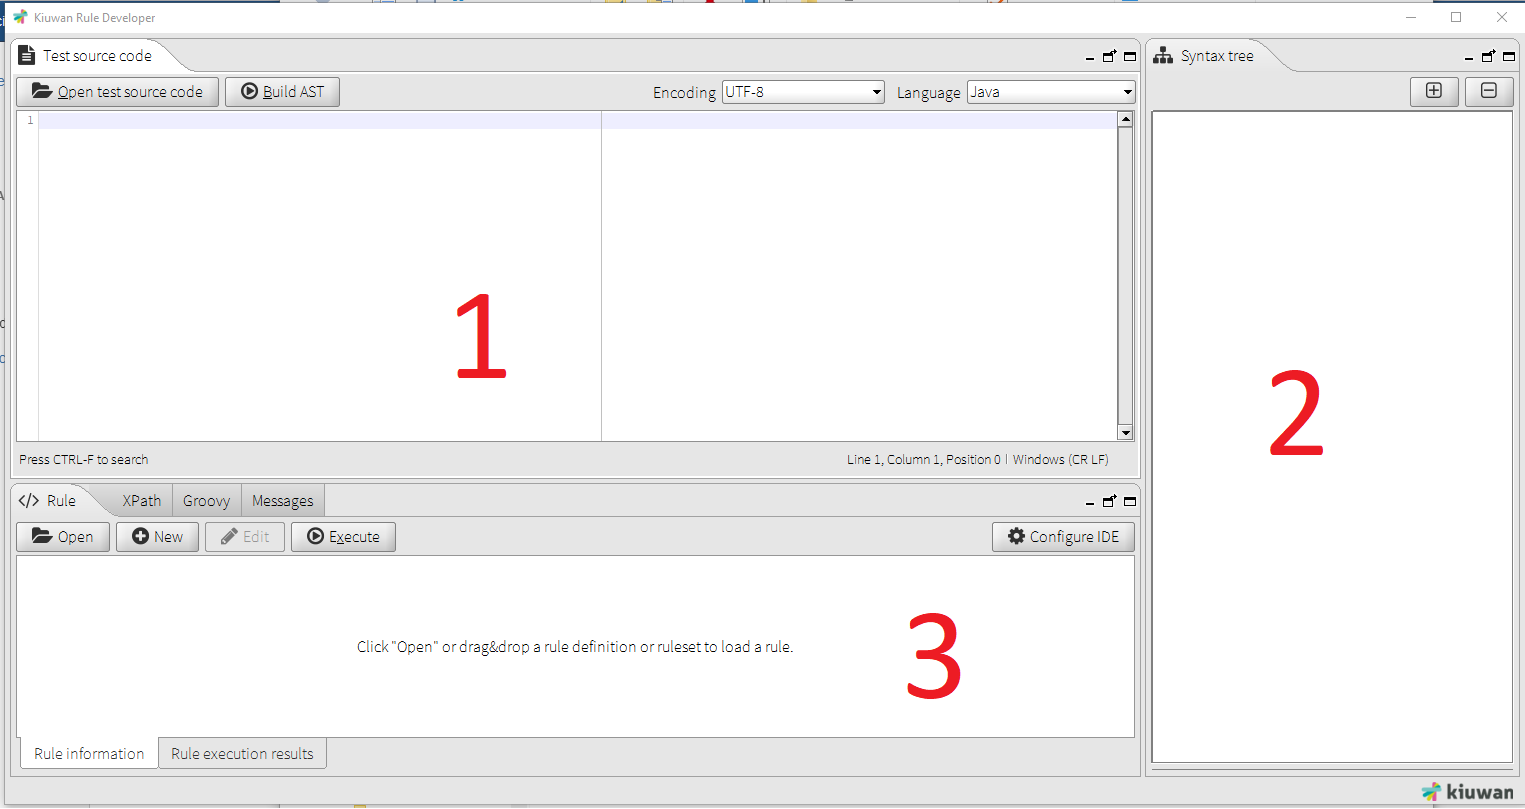
The Kiuwan Rule Developer user interface is divided into three areas:
- Top left: source code area: contains the source code the loaded rule will be run against.
- Top right: AST (Abstract Syntax Tree) area: where the tree describing the parsed source code will be shown.
- Bottom: the execution panels: where you can load, create and execute rules, XPath expressions, and groovy scripts.
Link the Kiuwan Rule Developer to your IDE
The first thing we will do is configure the Kiuwan Rule Developer to synchronize with an IDE. In this case, we will use the Eclipse project we have created before.
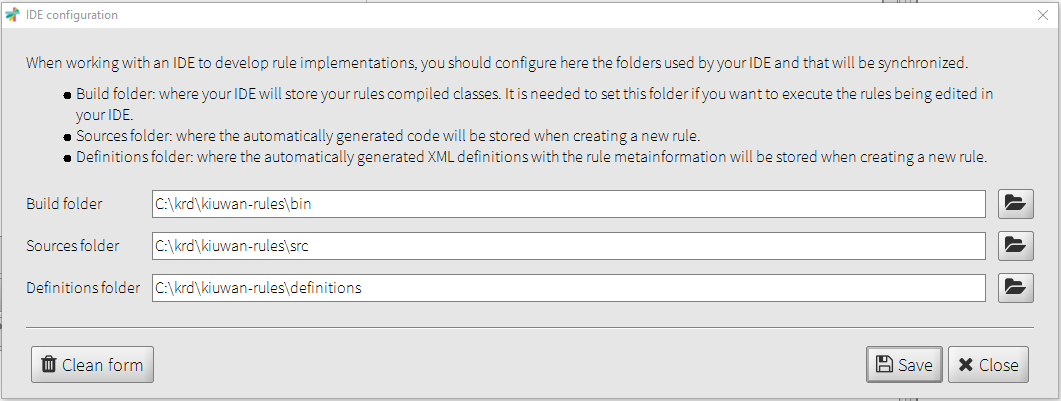
- Click Configure IDE on the bottom right of Kiuwan Rule Developer
- In the Build Folder field, type or look for the folder where Eclipse builds the project, in our case, /krd/Kiuwan-rules/bin
- In the Sources Folder field, type or look for the folder where Eclipse stores the source code, in our case, /krd/Kiuwan-rules/src
- In the Definitions Folder field, type or look for the folder we have created to store the rule definitions, in our case, /krd/Kiuwan-rules/definitions
Create a rule
Once the IDE and Kiuwan Rule Developer are wired, we can create a new rule definition.
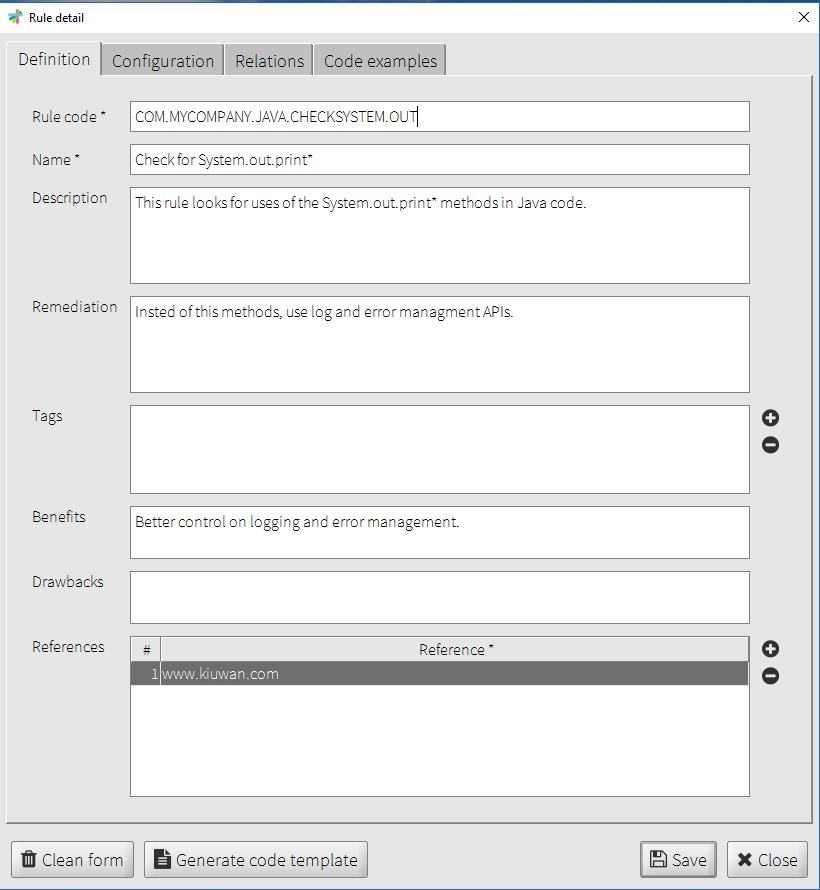
- Click New. The new rule window will appear.
- We will create a rule to check the usage of System.out.print* methods in Java language, so we fill the fields conveniently.
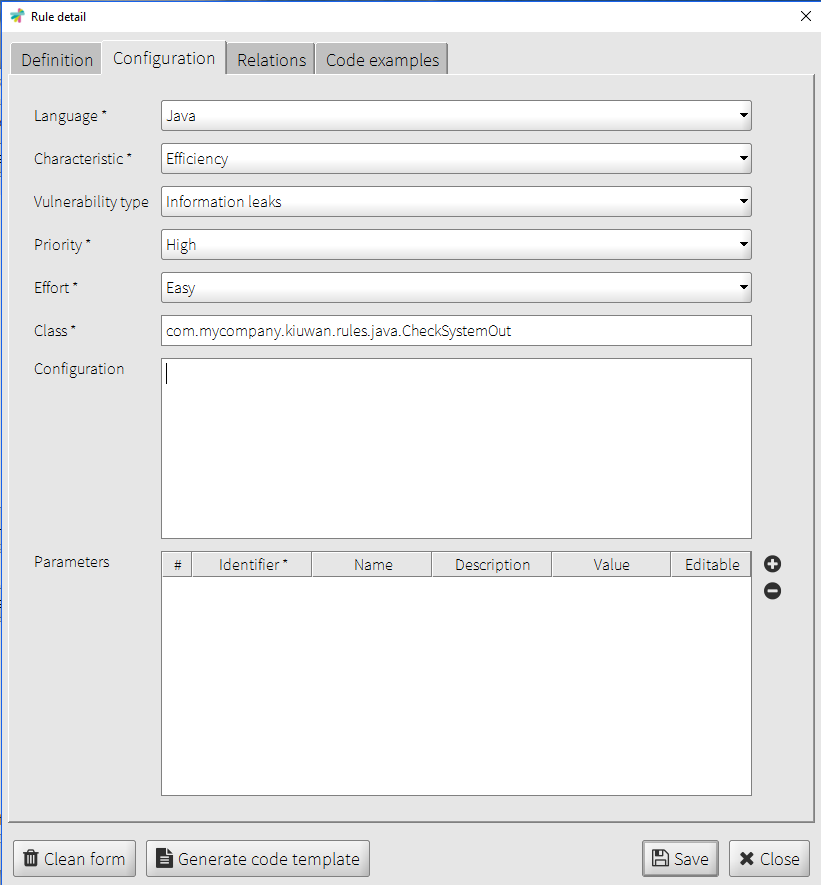
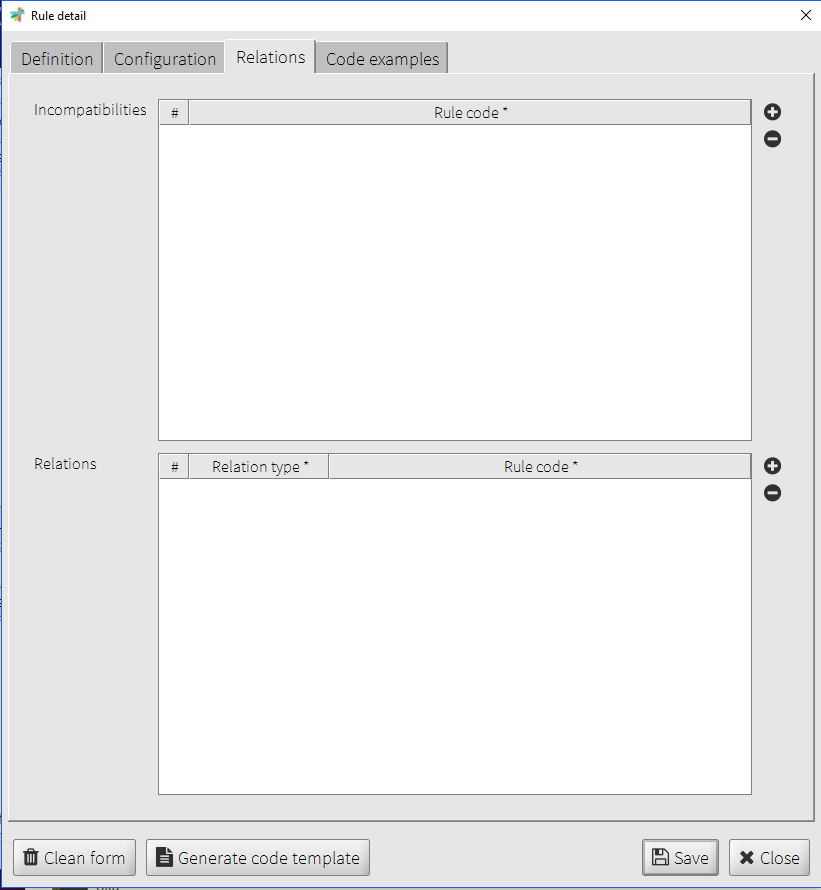
- Fill the Definition, Configuration and Relations fields with values that fit the purpose of the rule.
- Fill the Code examples text areas with an example of the violation the rule will detect and how to fix it.
- Once the fields are filled, click Generate Code Template to generate rule class implementation basic structure and then click Save to generate rule descriptor.
| Step | Screenshot |
|---|---|
| 2a. |
|
| 2b. | 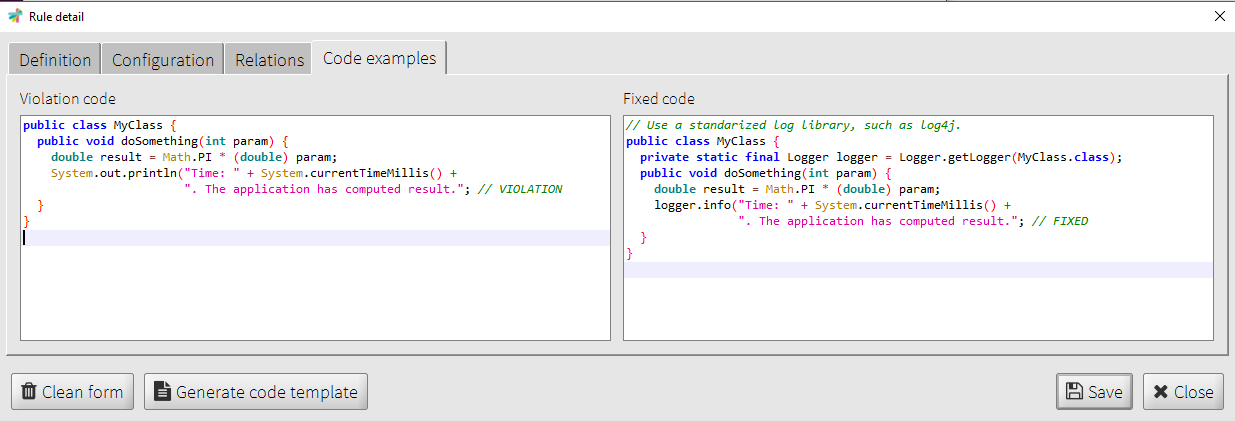 |
| 3. | 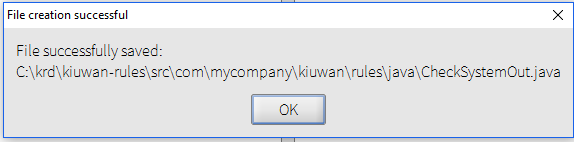 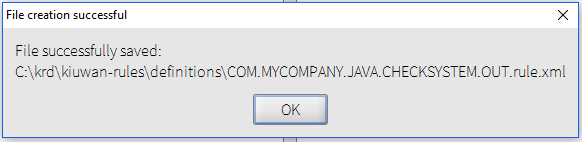 |
After saving the rule, two files will be created:
- The base source code of the rule, located in the previously configured build folder.
- The rule definition file, located in the previously configured definitions folder.
Once the new rule window is closed, Kiuwan Rule Developer will be prepared to execute your rule's implementation. But we first need to create that implementation.
Edit the rule template
Back to Eclipse, you should refresh to project contents to see the files created by Kiuwan Rule Developer.
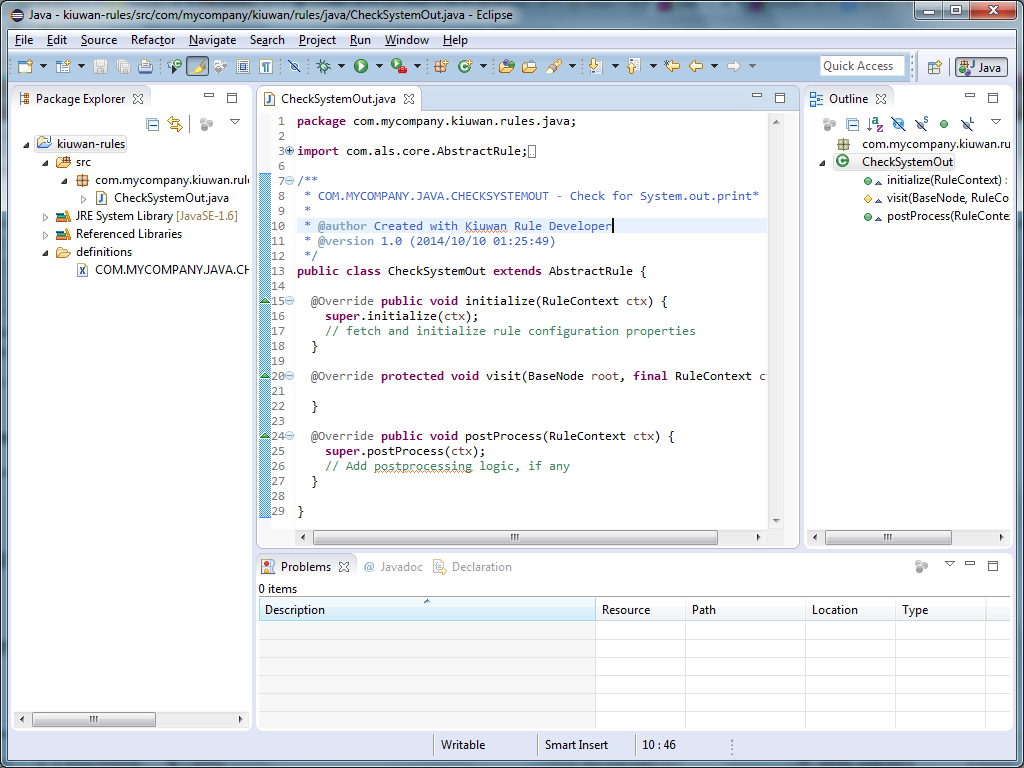
In our example, Kiuwan Rule Developer has created the following files:
- The rule base code: src/com/mycompany/Kiuwan/rules/java/CheckSystemOut.java
- The rule definition: definitions/COM.MYCOMPANY.JAVA.CHECKSYSTEMOUT.rule.xml
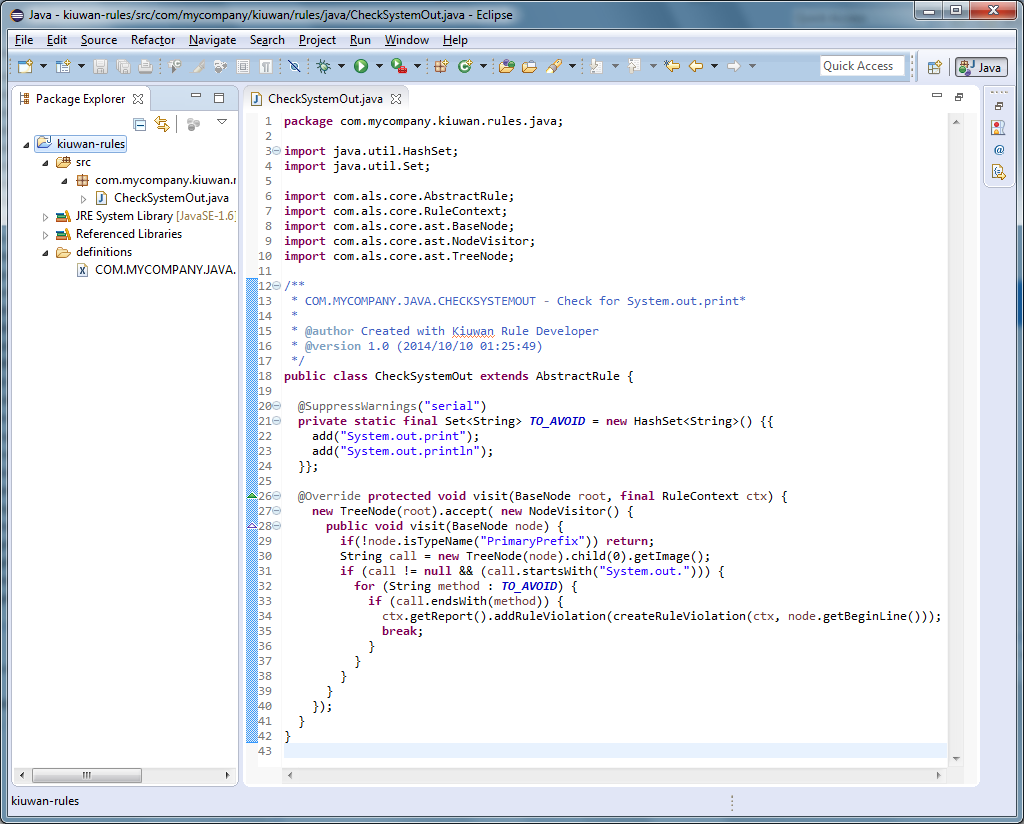
If you open the rule base code file, you will see the basic rule template. This is where you should add the code to detect the violations you want to find in your Java code. For more information on this topic, check the Getting Started with Rule Development guide.
In our example, we want to detect the uses of System.out.print(String) and System.out.println(String) in Java code. So this will be the source code for our rule:
Eclipse compiles the rules as we save changes in the file (you should have the Build automatically option turned on, under the Project menu), so we already have a .class file in the build folder that Kiuwan Rule Developer can execute.
Kiuwan API Javadoc
Note that you can access the Kiuwan API Javadoc anytime from your IDE, as we configured the Javadoc Location of the analyzer.jar file when we created the New Java Project, in the "Preparing your IDE" section.
Execute the rule in Kiuwan Rule Developer
Switch back to Kiuwan Rule Developer.
We will need a source code to test the rule against. We will copy the code example we entered when we created the rule in the new rule dialog:
- Copy or write down the source code in the Test source code tab.
- Click Generate AST to parse the file and create an Abstract Syntax Tree.
- Click Execute to see the results of applying the rule to the test code.

As you can see in the previous screenshot, the "Rule execution results" tab will be automatically selected with the results of applying the rule to the test source code. In our example, one violation will be detected in line 4. This line uses one of the methods the rule looks for.
You can modify the rule in your IDE and execute it in Kiuwan Rule Editor as many times as you need until you are satisfied with your rule's implementation. Kiuwan Rule Editor automatically detects changes in the compiled code, as long as you have correctly configured your IDE as we did in the previous sections.
Debug the rule in your IDE
Kiuwan Rule Developer allows you to remotely debug the rule you are editing in your IDE while it is being executed.
If you want to debug your rules, you should launch Kiuwan Rule Developer in debug mode. To do so, open a console and type:
Windows:
> AGENT_HOME/bin/agent --development debugPort=4444
Unix:
> AGENT_HOME/bin/agent.sh --development debugPort=4444
This will launch the Kiuwan Rule Developer and wait for a remote debug tool to be attached to the specified port (in the previous examples, the port is 4444).
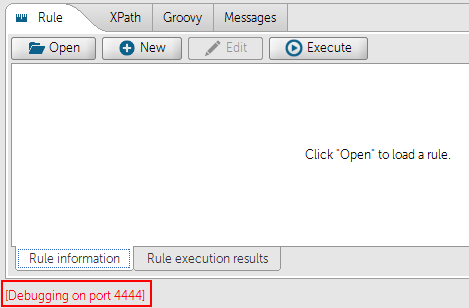
Note that the application will not be launched until the remote debug tool is detected by the process. Make sure the specified debug port matches the one configured in your remote debug tool. If the attachment is successful, you will see a red label indicating the current debugging port in the bottom left of the Rule Developer window:
Step 3: Upload a Rule to Kiuwan Quality Models Manager
Once we are happy with our rule, the next step is to upload the rule definition to Kiuwan.
- Access https://www.Kiuwan.com and log in to your Kiuwan account.
- Go to Model Management module (click on the menu at the top right of the screen).
- Create en empty quality model (New model, Create from scratch).
- Go to the Rules section and click Install rule definitions.
- Click the "Upload" button and select the rule definition that Kiuwan Rule Developer has created in the definitions folder.
- Click "Next" and click on the quality model you have just created to add your rule to it.
- Click on the "Install" button to proceed.
- Your rule will be installed into your library and will be added to the new quality model.
- Publish the quality model so you can assign it to one of your applications for analysis.
- Click on the configuration icon (top right of the screen) and click on the Application management option.
- Select the application you will analyze with the new quality model that contains your custom rule.
- Open the drop-down menu in the Quality parameters section and select the quality model you have created in step 3.
| Step | Screenshot |
|---|---|
| 3. | 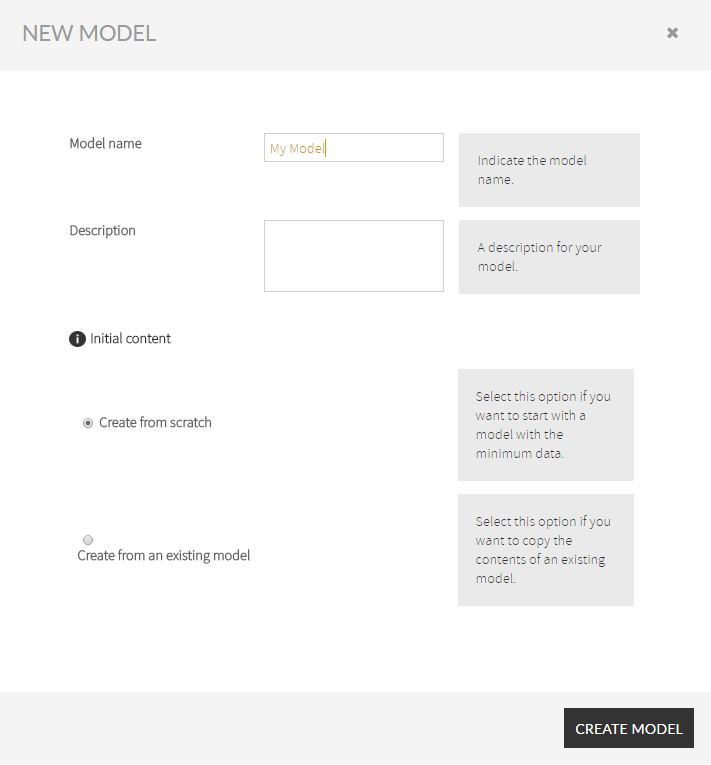 |
| 4. | 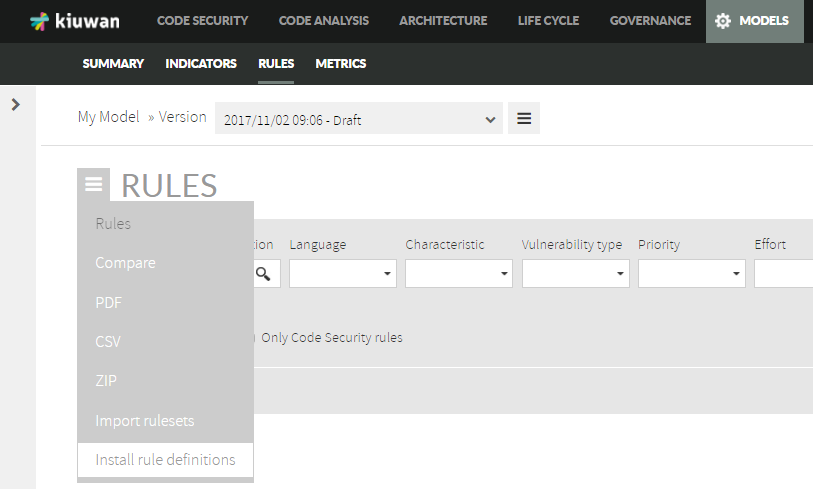 |
| 4.a. | 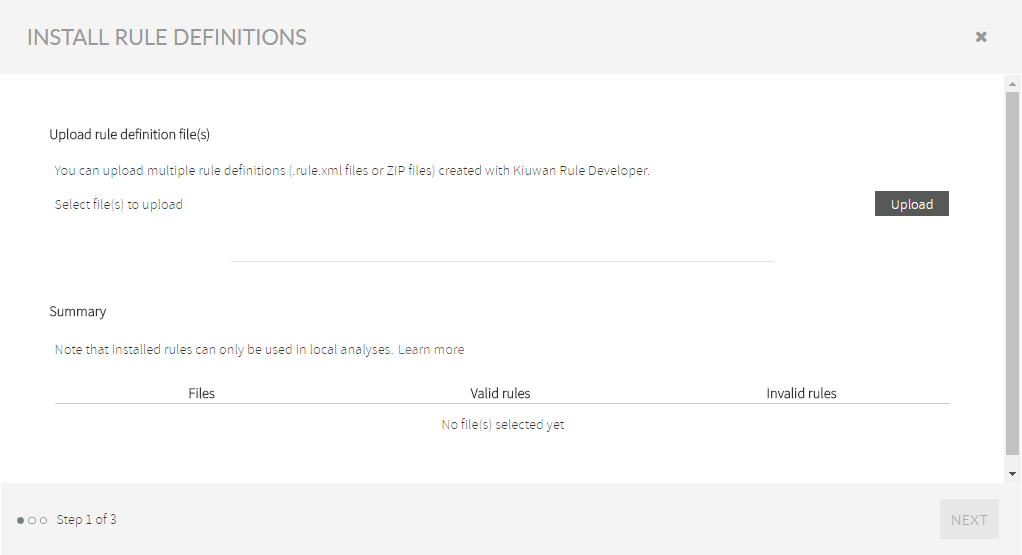 |
| 4.b. | 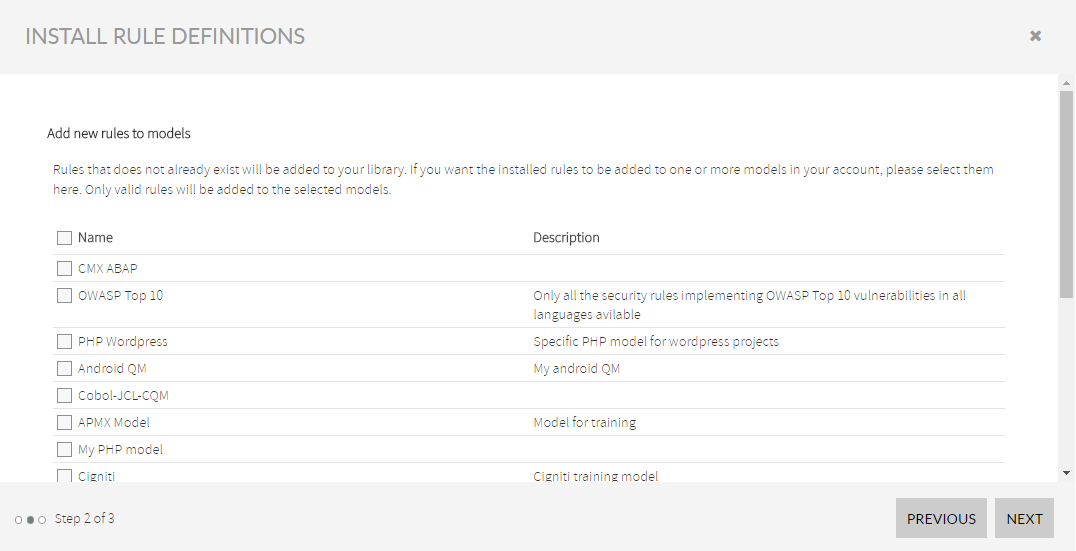 |
| 4.c. | 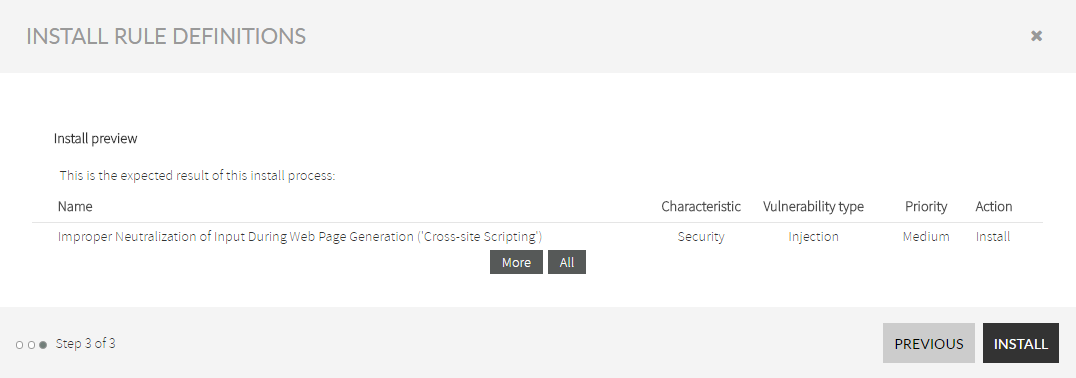 |
| 5. | 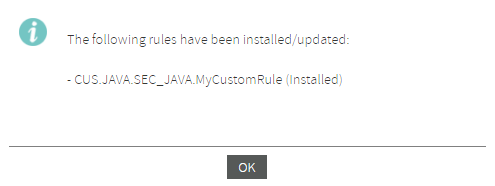 |
After following the previous steps, everything should be prepared to run a new analysis with Kiuwan Local Analyzer.
Step 4: Execute a custom rule analysis with Kiuwan Local Analyzer
Once your application has assigned the new quality model, we have to create a package with our rule so Kiuwan Local Analyzer can execute it.
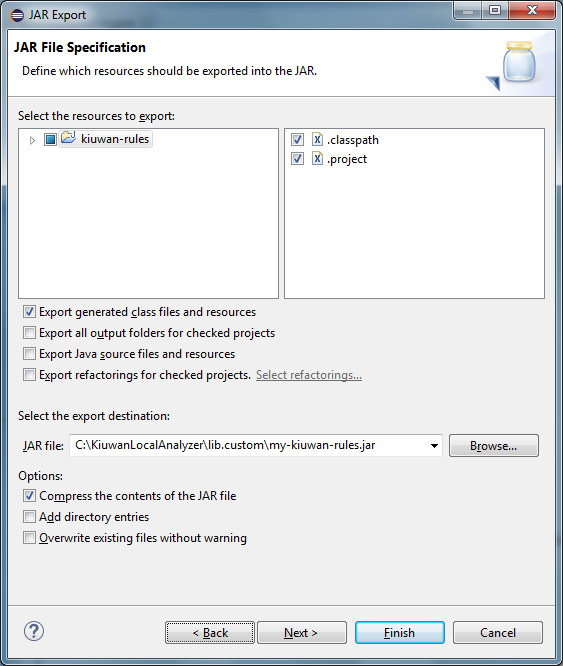
- In Eclipse, right-click on the rules project and choose Export... Java > JAR File.
- Browse for the lib.custom folder under the Kiuwan Local Analyzer folder and write a name for your rules jar archive. For example AGENT_HOME/lib.custom/my-Kiuwan-rules.jar
- Click Finish to export your rules project.
Now everything should be prepared to launch your analysis.
The next step is to run Kiuwan Local Analyzer and analyze your application. If you need more information on this topic, please read the Kiuwan Local Analyzer page.
We will use a test application made of two Java classes. One with a rule violation, one with no violations. We will call this application Test application.
Follow these steps to analyze the application in Kiuwan Local Analyzer:
- Run Kiuwan Local Analyzer by double clicking AGENT_HOME/Kiuwan.cmd script in Windows or by running the AGENT_HOME/Kiuwan.sh script in Unix OS.
- Log in with your Kiuwan account.
- Select the application you want to analyze with your custom rules. In our case, this will be Test application.
- Select the source code you want to analyze and click Next.
- Click Analyze. You will see in the status bar (bottom of the window) that Kiuwan Local Analyzer first downloads the quality model associated with the selected application, in our example, My company quality model and, then, analyzes the source code you have previously configured.
- Click View results to access the Kiuwan site and see the results.
Step | Screenshot |
|---|---|
3. and 4. | 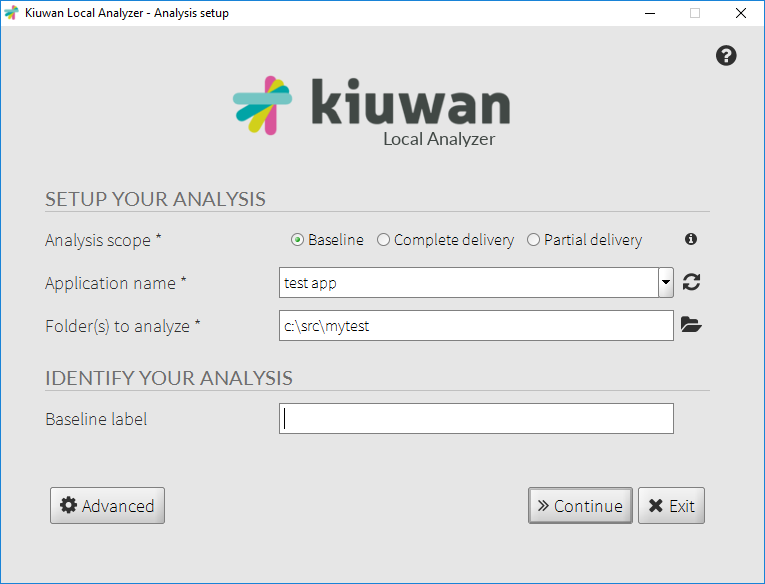 |
| 6. | 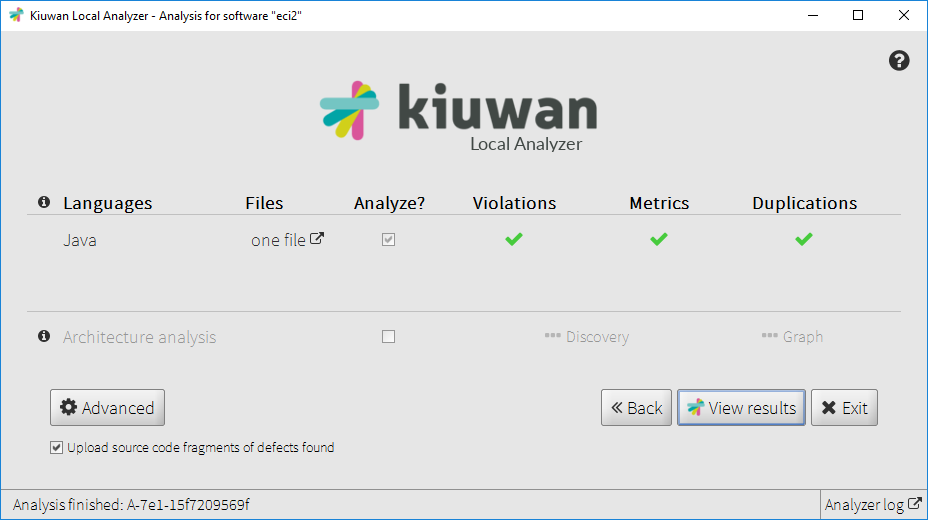 |
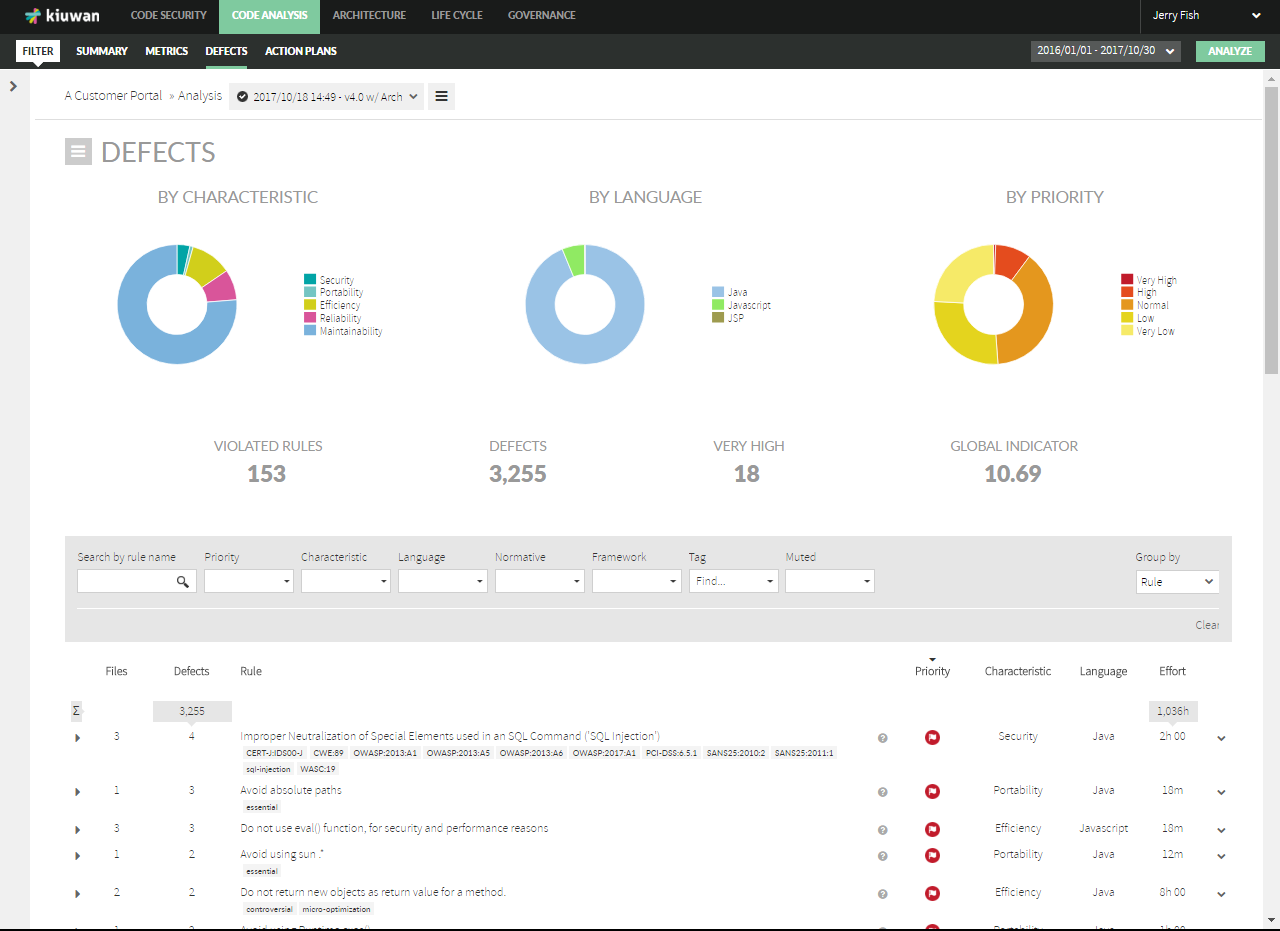
Step 5: View the Analysis Results
Once the analisis is done, you can check the results by clicking View results. A browser window will open and the Kiuwan web page will appear with the results of the analysis.
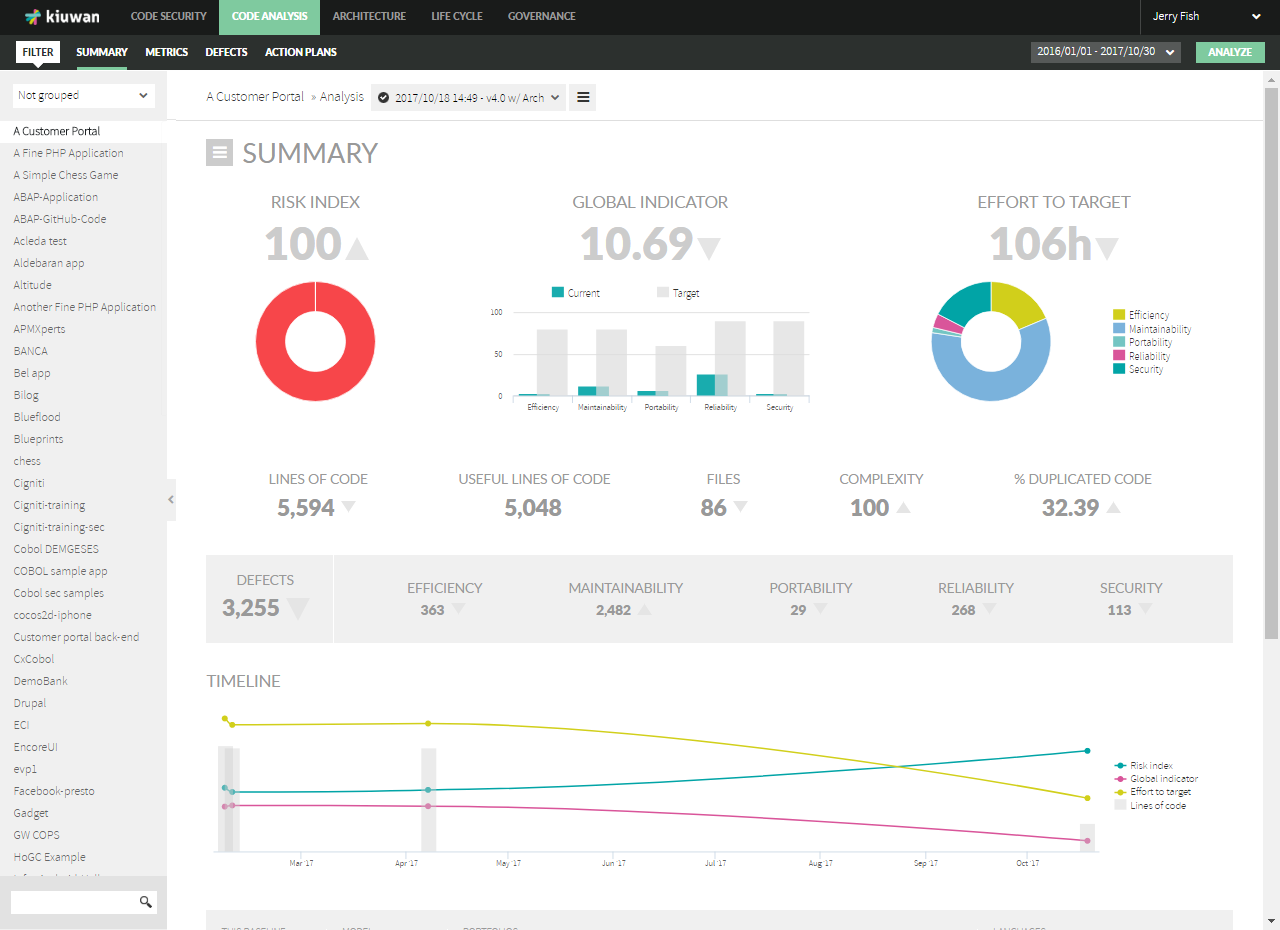
Access the Defects section to see a defect emitted by the custom rule you have just created with Kiuwan Rule Developer.
Summary
In this quick start guide, we have seen how to create, modify, pack, install and execute a custom rule for Kiuwan. We can summarize the needed steps in the following list:
- IDE: create a project and configure it to be used with Kiuwan Rule Editor.
- Kiuwan Rule Developer: wire with your IDE.
- Kiuwan Rule Developer: create a custom Kiuwan rule.
- IDE: implement your custom rule from the automatically created template.
- Kiuwan Rule Developer: execute and check the results of your custom rule.
- Kiuwan: install your custom rule and use it in a quality model.
- IDE: pack your custom rule code and deploy it to Kiuwan Local Analyzer.
- Kiuwan Local Analyzer: execute an analysis of your application.
- Kiuwan: view the results of analyzing your application with your custom rule.
Next Steps
The next steps you should follow are:
Read the Getting Started with Rule Development guide.
- Read the Rule Development Manual, found under the AGENT_HOME/development/doc folder.
- Check the rule examples included under the AGENT_HOME/development/doc/samples folder.