This guide will show you how to integrate Kiuwan into Team Foundation Server 2017.
Contents:
| Table of Contents |
|---|
1. Install the KLA in the agent machines
See how to install KLA here: Install and Start Up Kiuwan Local Analyzer
2. Select an existing project in TFS or create a new one
In TFS, every project must have one or more associated Version Control repositories associated with it. This way the build agents take care of extracting the source code automatically. In TFS 2017, the supported repositories are Git and TFS itself.
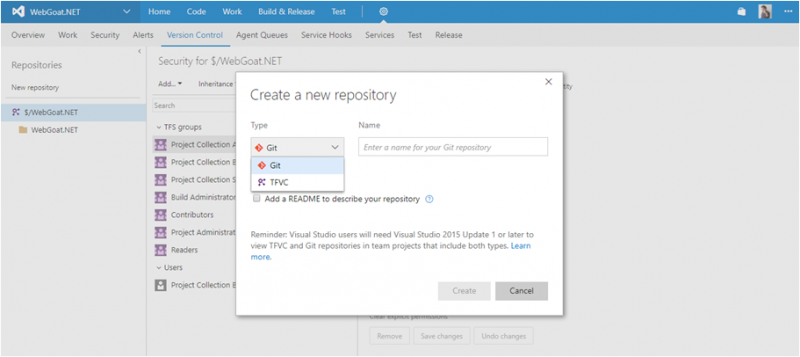

For existing projects, most probably it is likely that the repositories will be are already configured and the code should be already there. For new projects, add the your code to version control from Visual Studio.The repositories you configure here will be the ones that new Build definitions will use by default.
3. Configure a new build step
The new build step will run the Kiuwan analysis in a project's existing build configuration. It is possible to also create a new build configuration to include the Kiuwan analysis step.

Click the build definition edit link to add new build steps.
4. Define variables
In the Build Definitions settings screen, define a couple of two variables that will be available for the build agent at execution time, to hold your the Kiuwan credentials necessary to run the analysis. Look To do this, first look for the variables section in the top Build definition submenusub-menu.

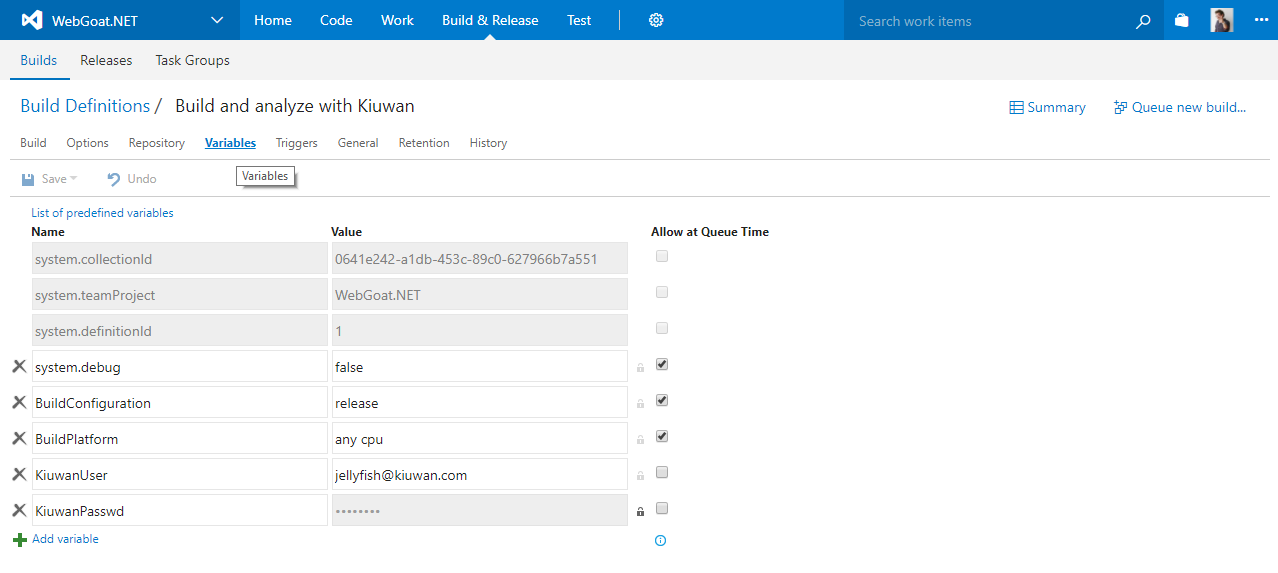
Click Add variable to create and give the new variables name such as KiuwanUser and KiuwanPasswd variables (you can choose other names of course).
| Info |
|---|
Click the lock icon to the left of the password variable value to hide it! |
5. Configure a new build step
Go back to the
build definition configuration, first option in the top Build definition submenuBuild Definition configuration page. Click Add build step... to configure a new build step.

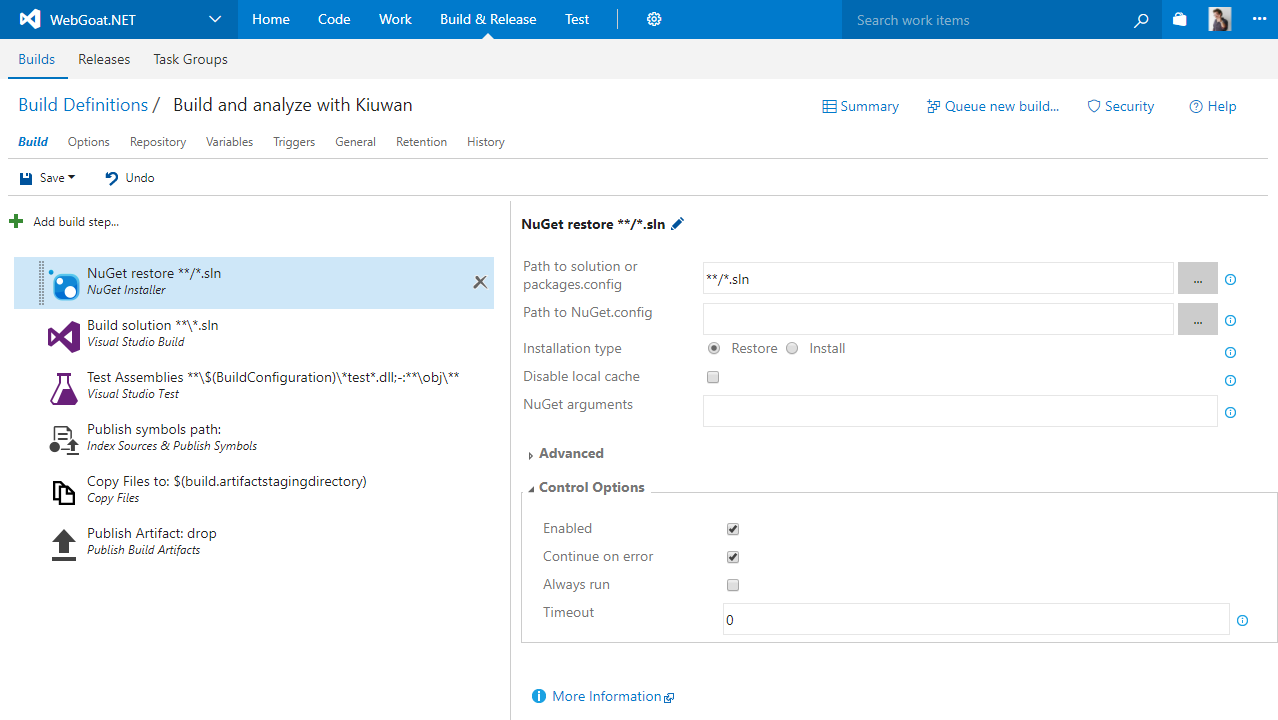
Depending on the build definition template you selected to create your build, you will have some pre-configured build steps. In the screenshot above you have the step for a Visual Studio build. Click the Add build step… link.
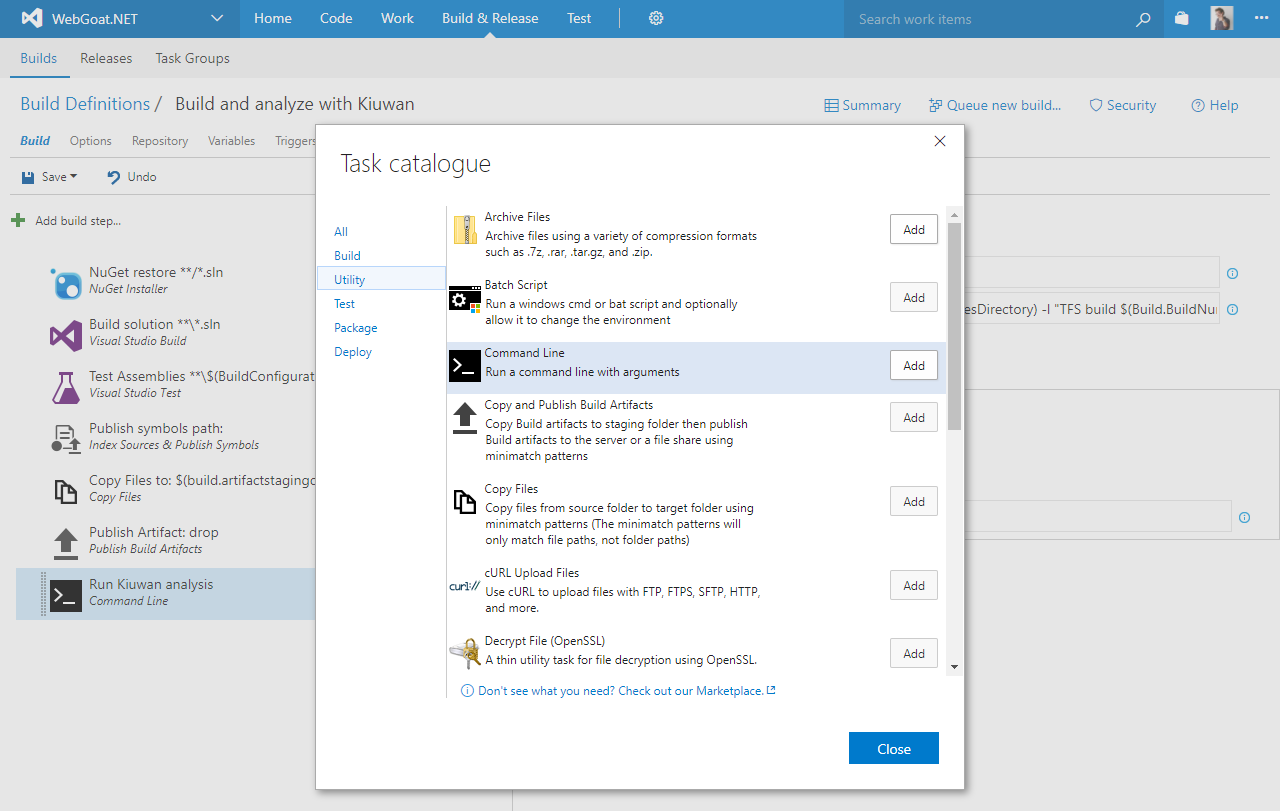

From the Task catalogue, in the Utility section, select the Command Line task.
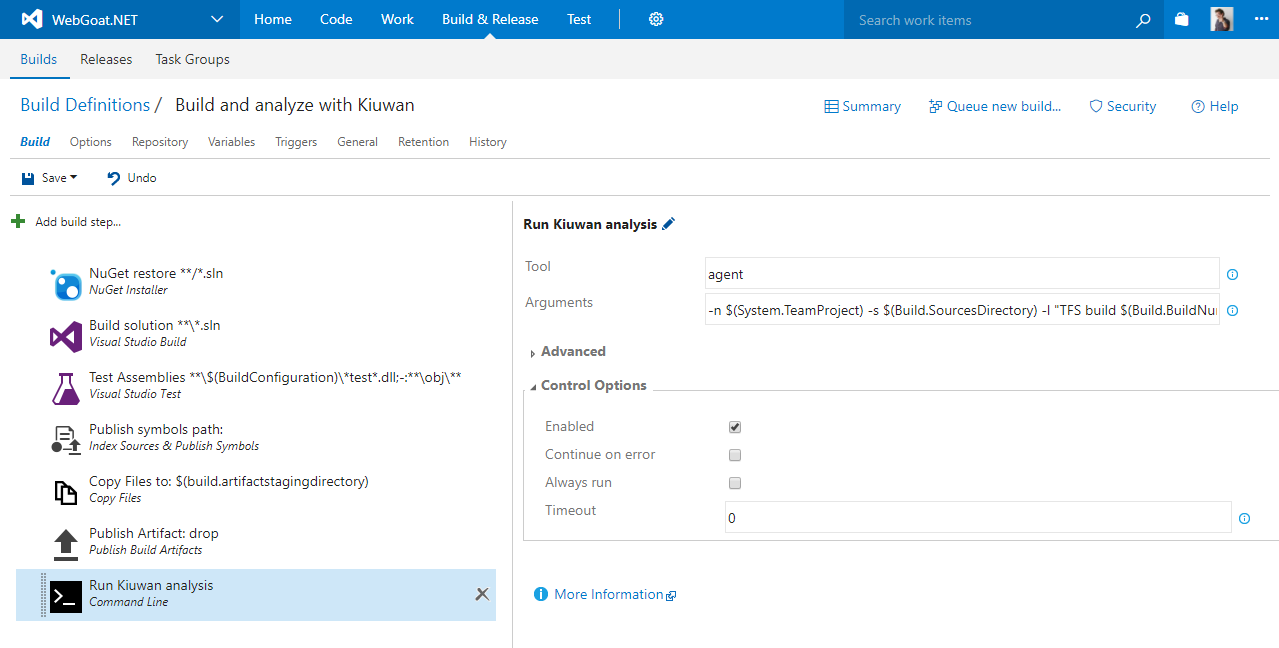
6.
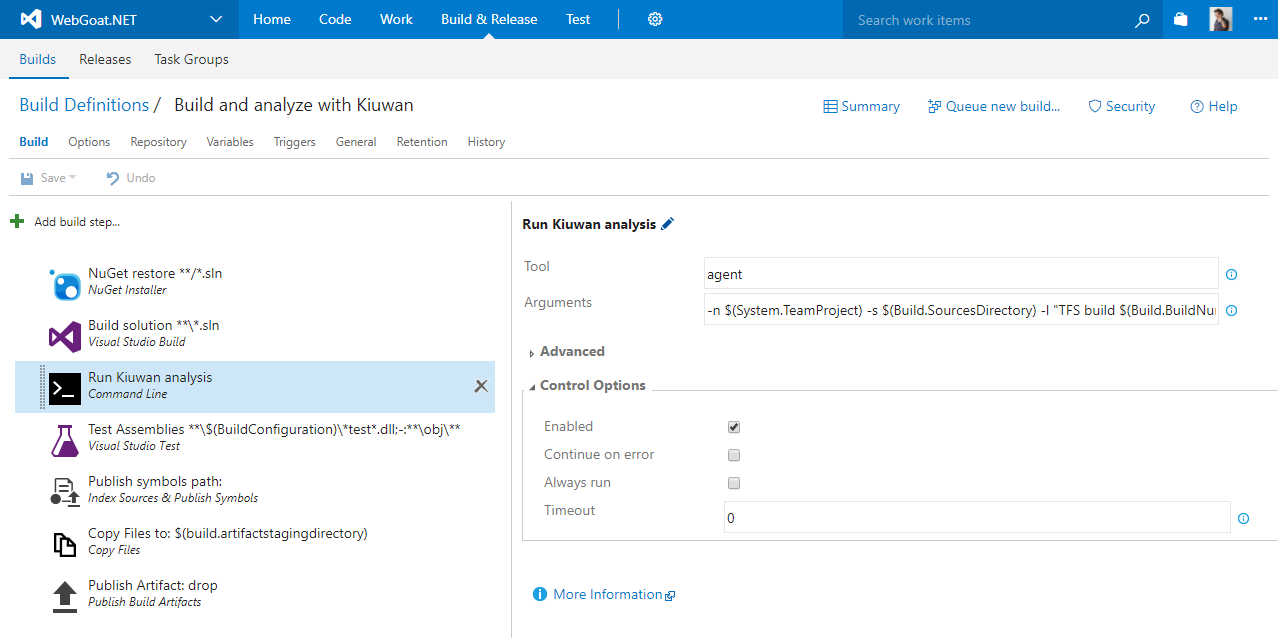
Now, let’s configureConfigure the command line task
Configure the command line task to run a Kiuwan analysis using the Kiuwan Local Analyzer CLI. Give the step a name (Run Kiuwan analysis
| Title | Description |
|---|---|
| Name | Run Kiuwan Analysis (in this case) |
agent (this is the KLA command). And the arguments passed to the Tool are as follows:-n | Tool | agent | ||
| Arguments |
|
We are using System and Build predefined variables from TFS for the name of the application to analyze (it will be the project name), the directory where the source code is (it will be the checkout directory), and the label for the analysis (it will be the build number). Finally, we use the |
two variables we previously defined for the Kiuwan credentials. Using variables ensures consistency for every analysis and make them independent of the build agent machines that run them. |
| Control Options | Continue on error |
= if checked, the build continues even if the analysis fails ( |
the analysis |
could not run for some reason, it |
does not affect the results of the |
analysis |
). |
| Info |
|---|
This configuration will run a Kiuwan Baseline analysis. If you want to run a delivery analysis for a change request, you can define another build configuration where the analysis step will have extra parameters for the KLA agent to run a delivery analysis. Refer to the Kiuwan Local Analyzer documentation for more information on the available parameters. |
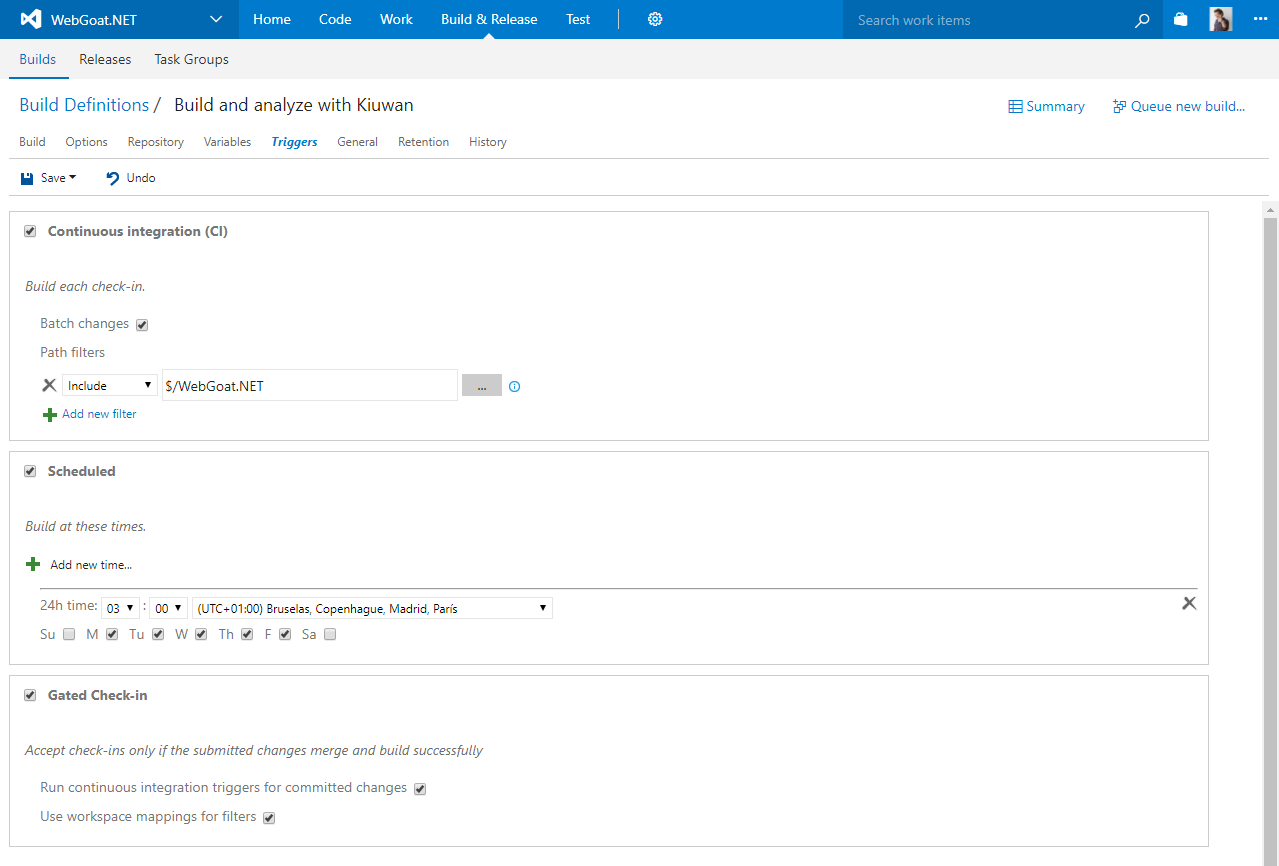
7. Define triggers to run the build
7.
The last thing is to define triggers to run the build on the project on given conditions.
The possibilities here are:
| Description |
|---|
| Image | |
|---|---|
|
|
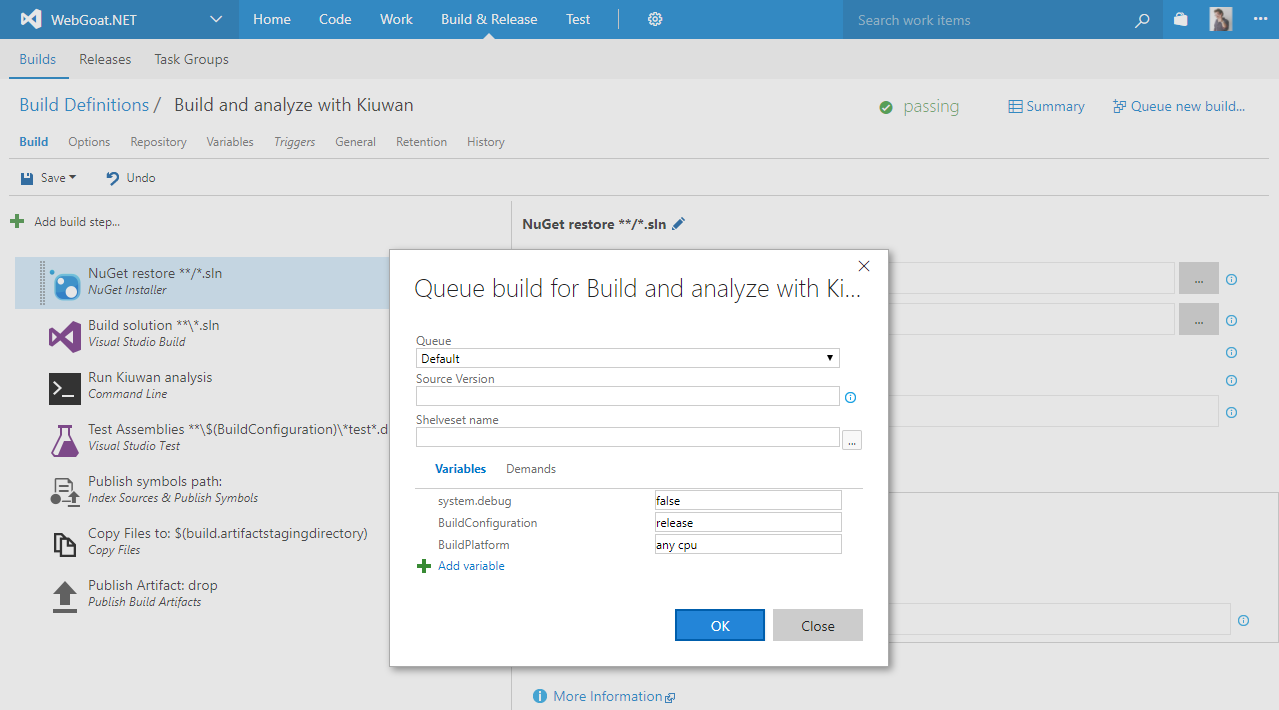
Or any combination of the 3. This is a cool feature. For testing purposes, you can always run your build clicking the click Queue new build… link on the top right of the above screento run the build.

Congrats! You are done configuring a build definition that will run an automatic Kiuwan analysis.

8. Run a build from Visual Studio and see the results
Now we are going to see how the build we have just configured triggers The configured build will trigger automatically after checking-in a and committing changes to the project files from Visual Studio.
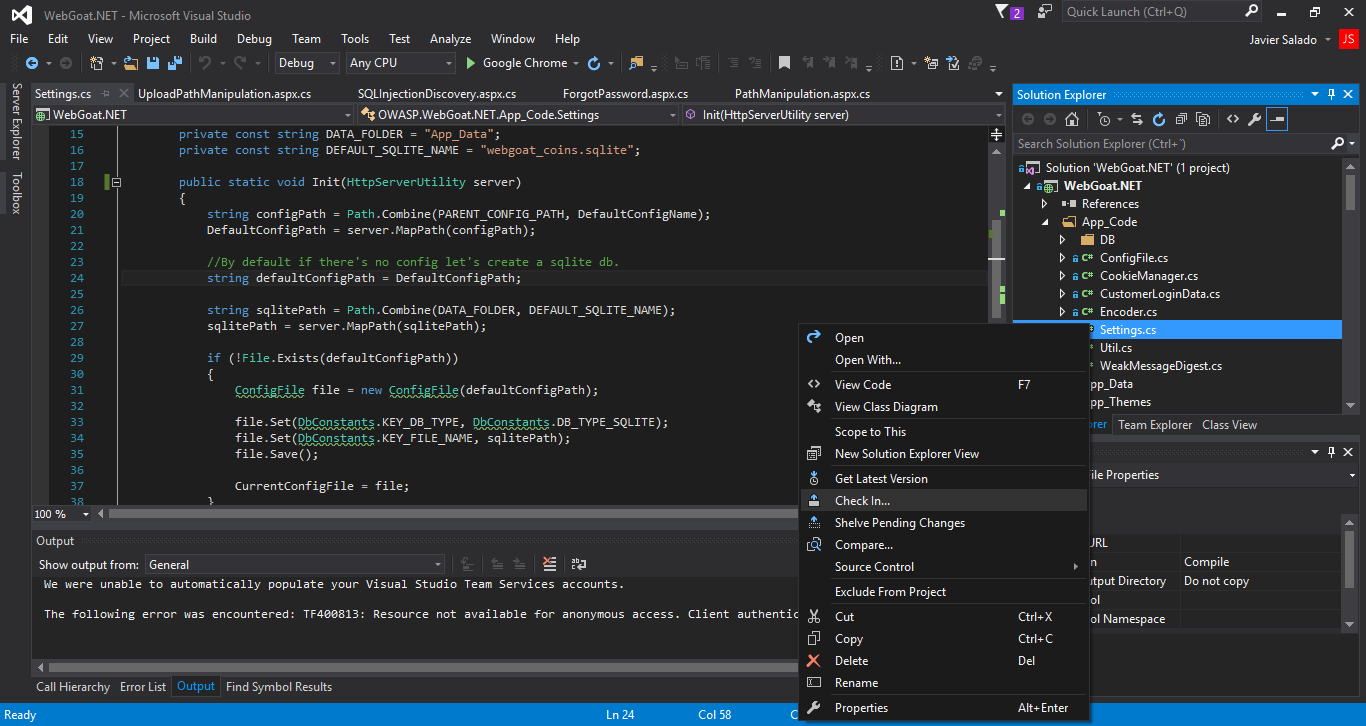
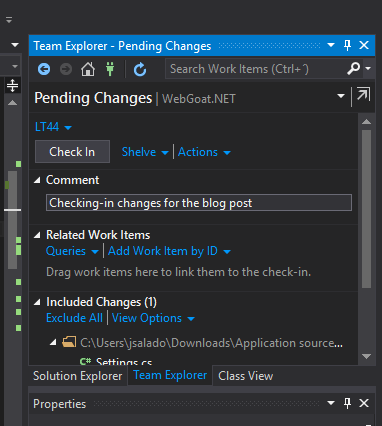
I have done some changes to Settings.cs file in my project and I’m ready to check it in. I add a comment in the Team Explorer panel


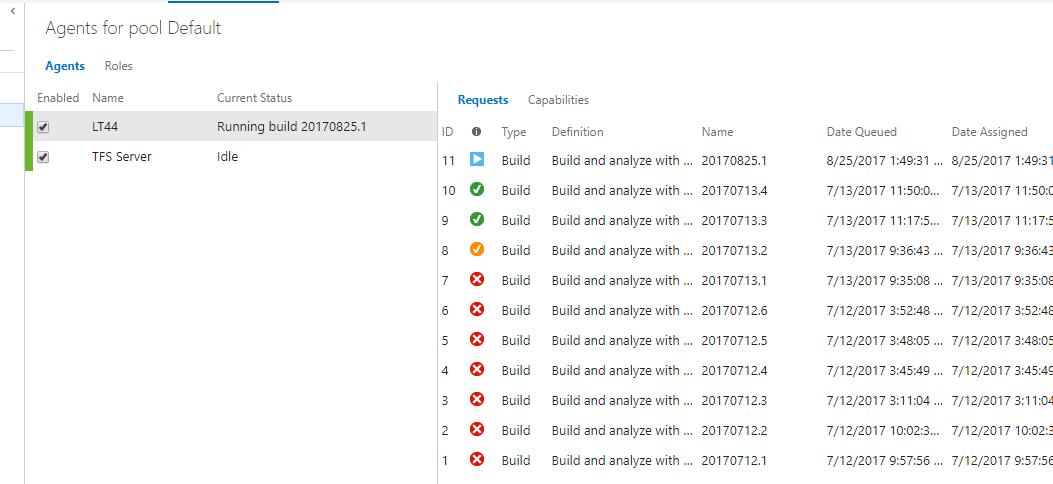
Once the check-in finishes in Visual Studio we , go to TFS to see confirm that our the "Build and analyze with Kiuwan" build has been queued and it is running:

To By clicking the build name in the right hand side table, we can see the console output from the build agent and the progress of the different steps. In particular the step we configured to run the Kiuwan analysis., click the build name in the table on the right.


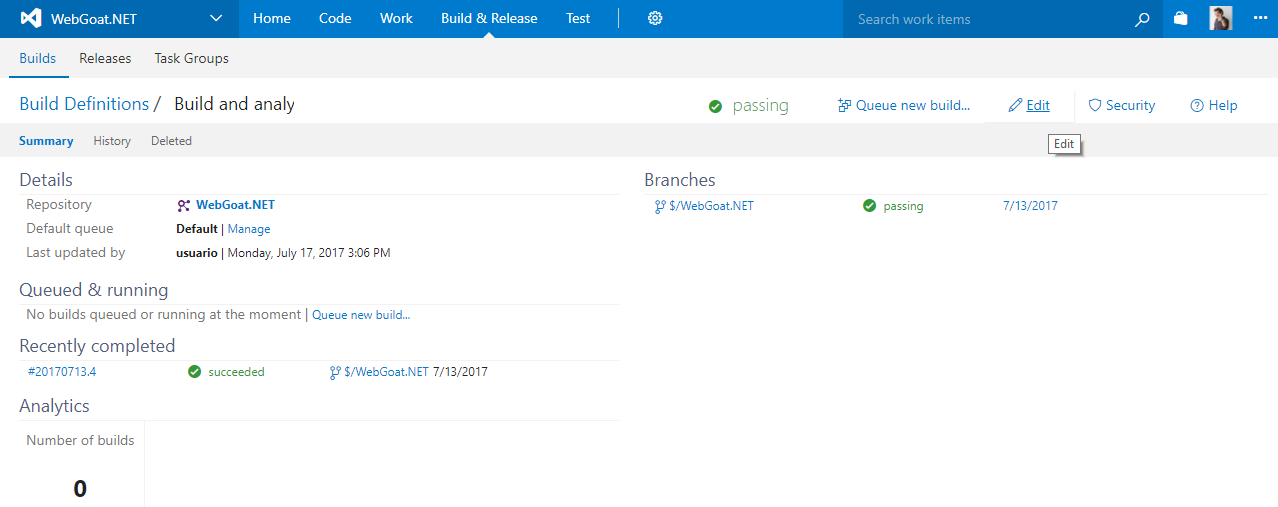
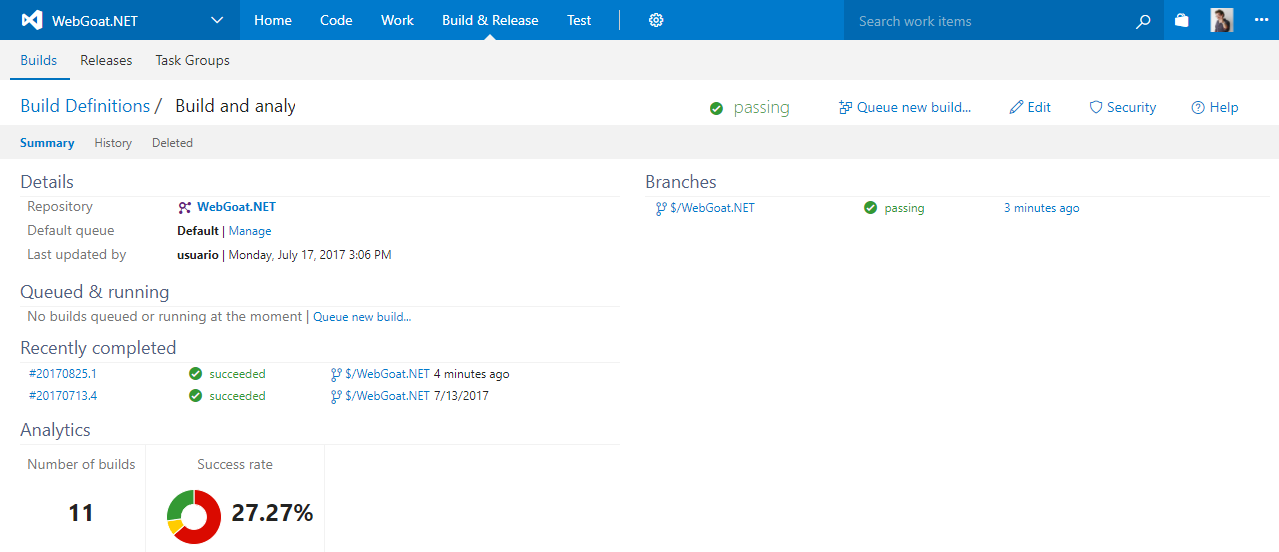
After all the steps finished successfully we can see our , you can view the build definition summary with the results of the recent builds and more historical information.

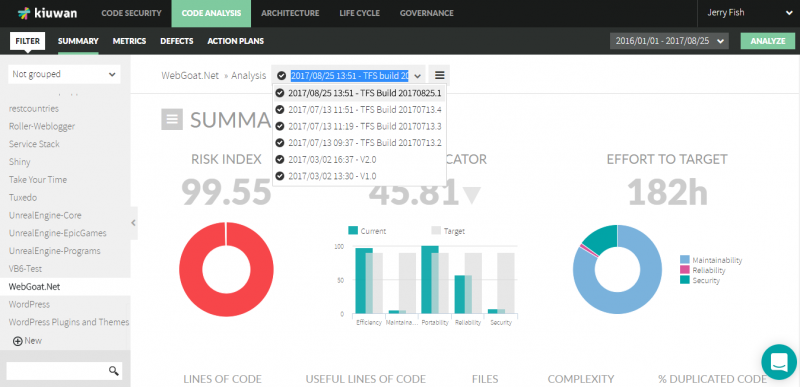
Login to your Now we just need to login to our Kiuwan account in the cloud to see the results of this build analysis. We can clearly see the analysis label corresponding to the build number that just executed successfully.


So there you go! Your applications continuously analyzed with Kiuwan using TFS 2017.
Once you know how to configure a Kiuwan analysis as part of a TFS Build definition the possibilities are endless. It all depends on how exactly you want to drive your software development process and your continuous integration pipelines.
And going beyond with the REST APIs from Kiuwan and TFS 2017 you can build custom integrations to, for example, create work items in your TFS projects from Kiuwan action plans. The sky's the limit...