This guide will show you how to integrate Kiuwan with a Local Authentication systeminto an SSO-SAML local authentication environment.
Contents:
| Table of Contents |
|---|
Introduction
Kiuwan can be integrated with a Local Authentication system.
This is a common scenario in organizations that validate their employees' credentials against their authentication system, and do not want them to use other credentials when accessing external services.
If your company uses a corporate authentication service, your users and passwords will most probably be stored in Active Directory, OpenLDAP, IBM Tivoli or any other similar system.
If that is your case, it’s not needed to have different credentials for your Kiuwan account, you can use existing ones.
| Info |
|---|
By integrating Kiuwan with your Local Auth service, you will make Kiuwan authentication to delegate on your system, avoiding the need to use/maintain additional credentials. |
Local Authentication scenarios
Depending on your infrastructure, there are at least two possible scenarios:
Centralized Authentication
Do you need to login to every system in your organization using the same user/password? Are you tired to type the same credentials to access different systems? This is a clue that your organization maintains a centralized authentication system (i.e. your organization is keeping your credentials in a unique system) that is used by the different systems.
Single Sign-On (SSO)
Do you only need to authenticate once and you can access the different systems? That is evidence that your systems are internally using an authentication system that is shared by the different applications, making unneeded to type your credentials when you access those systems. This is what is called a Single Sign-On environment.
If you want to avoid using/maintaining Kiuwan credentials, ask you first which of the above models apply to your organization, and don’t care, Kiuwan supports both !!
| Info |
|---|
FollowsThere are two different mechanisms to make Kiuwan work in an SSO environment.
|
Delegated Authentication Single Sign-On
Centralized authentication is also known as “delegated authentication”.
In this scenario, Kiuwan delegates your authentication to an external system, it’s a matter of trust!!How this can be accomplished? Take a look at the next image..
The following image describes how it works:
| Image | Description |
|---|---|
 | In this scenario:
|
|
|
|
|
|
|
|
|
|
|
|
|
|
|
You can find a sample authentication service application (kiuwan/kiuwan-local-authentication) as a sample to get started. This sample application uses Tomcat (tomcat-users.xml) as an authentication mechanism, but you can freely adapt to any other external auth system.
You can find details on how to set it up here
Single Sign-on (SSO) with SAML 2.0
As you have seen during the explanation of the Centralized Authentication scenario, you need to provide some authentication service application that generates the auth token based on Kiuwan’s provided secret key. Therefore, to use this scenario you must set up this specific app.
A different approach is to use a more advanced approach that makes use of a “standard” mechanism to which A different approach is to use a more advanced approach that makes use of a “standard” mechanism to which most vendors adhere to (SAML’s Single Sign-OneOn).
| Info |
|---|
Since April 2019 release, Kiuwan allows you to log in to a SAML Single Sign-One (SSO) environment. By implementing SSO, a user can log in to different independent systems through the use of a single set of credentials, centrally managed in a repository |
In a SAML - SSO scenario, we can define the following actors or participants:
A User requesting for some resource or service
A Service Provider (SP) that receives the request and provides the service or access to the resource
An Identity Provider (IdP) that authenticate the user and asserts the user identity

SSO can be implemented through different protocols, being SAML and OpenId Connect being the most widely used.
Kiuwan currently supports SAML and this document serves as a how-to to use Kiuwan in an SSO-SAML environment.
In summary, if your organization is using some kind of centralized users’ credentials repository implementing SAML and you want to use those enterprise credentials to authenticate in Kiuwan, this document provides you with information on how to set up Kiuwan to participate in an SSO-SAML environment.
What is SAML?
| Info |
|---|
SAML stands for Security Assertion Markup Language and it’s an open standard for exchanging authentication and authorization data between parties. In particular, between an identity provider (IdP) and a Service Provider (SP). |
SAML is an XML-based markup language for security assertions usually transferred from IdPs to SPs. These assertions are used by SPs to make access-control decisions.
SAML assertions contain three types of statements:
Authentication statements
Example: User U has been successfully authenticated at time T using method M of authentication
Attribute statements
Example: User U does contain value V for attribute A
Authorization statements
Example: User U is permitted to perform action A on resource R
Besides assertions, SAML defines SAML protocols, i.e. the processing rules to use assertions between SPs and IdPs.
Examples of such protocols are :
Assertion Query and Request Protocol
Authentication Request Protocol
etc.
These SAML protocols can be mapped to standard messaging formats. This mapping is called a SAML binding, examples of such bindings are:
SAML SOAP Binding
HTTP Redirect (GET) Binding
HTTP POST Binding
etc.
Finally, SAML profiles describe in detail how SAML assertions, protocols, and bindings combine to support a defined use case.
SAML 2.0 provides support for many profiles such as:
Web Browser SSO Profile
Identity Provider Discovery Profile
Assertion Query/Request Profile
etc
| Info |
|---|
The most important SAML 2.0 profile is the Web Browser SSO Profile, and it’s fully supported by Kiuwan. |
SAML Security requirements
The SAML specifications recommends:
TLS 1.0+ for transport-level security
XML Signature and XML Encryption for message-level security
Web Browser Single Sign-On
Here is an image describing how Single Sign-On works:
| Image | Description |
|---|---|
 |
|
SAML 2.0 Metadata
In the Web Browser SSO workflow above, there are some interactions between the IdP and the SP that are based on mutual trust, for example:
How does the SP know the IdP is authentic? And in turn, how does the IdP know the SP is authentic?
How does the SP know where to send the user agent with the auth request? And how does the IdP know where to send the user agent with the auth response?
How does the IdP encrypt the SAML assertion so that the trusted SP (and only the trusted SP) can decrypt the assertion?
How does the service provider know that the auth response is coming from a trusted IdP?
| Info |
|---|
These and other similar “trust” trust conditions are based on the use of SAML 2.0 Metadata.
Metadata ensures a secure transaction between an IdP and an SP through the sharing of trusted information. SAML 2.0 provides a well-defined, interoperable metadata format that entities can leverage to bootstrap the trust process. |
Regarding SSO SAML actor’s identity, metadata are defined for:
Identity Provider metadata (to publish identifying information about the IdP itself)
Service Provider metadata (to publish identifying information about the SP itself)
Also, the endpoints of communication are defined by metadata, such as:
SSO Service metadata (description of IdP’s SSO endpoint)
Assertion Consumer Service (desc of SP’s service to send assertions from the IdP)
How to configure Kiuwan to work with SSO - SAML
| Info |
|---|
As explained before, Kiuwan plays the role of Service Provider (SP) in an SSO - SAML context. |
To configure SSO in Kiuwan you must first, of course, rely on an existing Identity Provider (IdP). There are many available IdP systems, all of them sharing SAML concepts (more or less adapted to their terminology).
As seen above, to set up a Web SSO environment, SAML agents (idP and SP) need to be identified and let each other know of their existence.
This step is accomplished by exchanging each other’s metadata.
Kiuwan configuration: How to configure your IdP in Kiuwan
| Info |
|---|
Kiuwan provides an administration page to configure your IdP metadata. |
You can find the SSO configuration page at Account Management >> Organization and clicking on Configure SSO button.
Please read carefully the notes:
By activating the SSO in your account,Go to Account Management > Organization and click Configure SSO.
| Image | Description |
|---|---|
 | The following notes are shown in the window, which should be read carefully:
|
|
|
|
|
|
|
|
Click Continue to upload your IdP Metadata XML.
In a typical ADFS installation, you can commonly get it at https://<your_idp_domainname>/FederationMetadata/2007-06/FederationMetadata.xml

| Info |
|---|
If your IdP is Azure AD, please be sure to check check the checkbox My IdP is Azure AD. |

Once it’s loaded, click on Continuebutton .
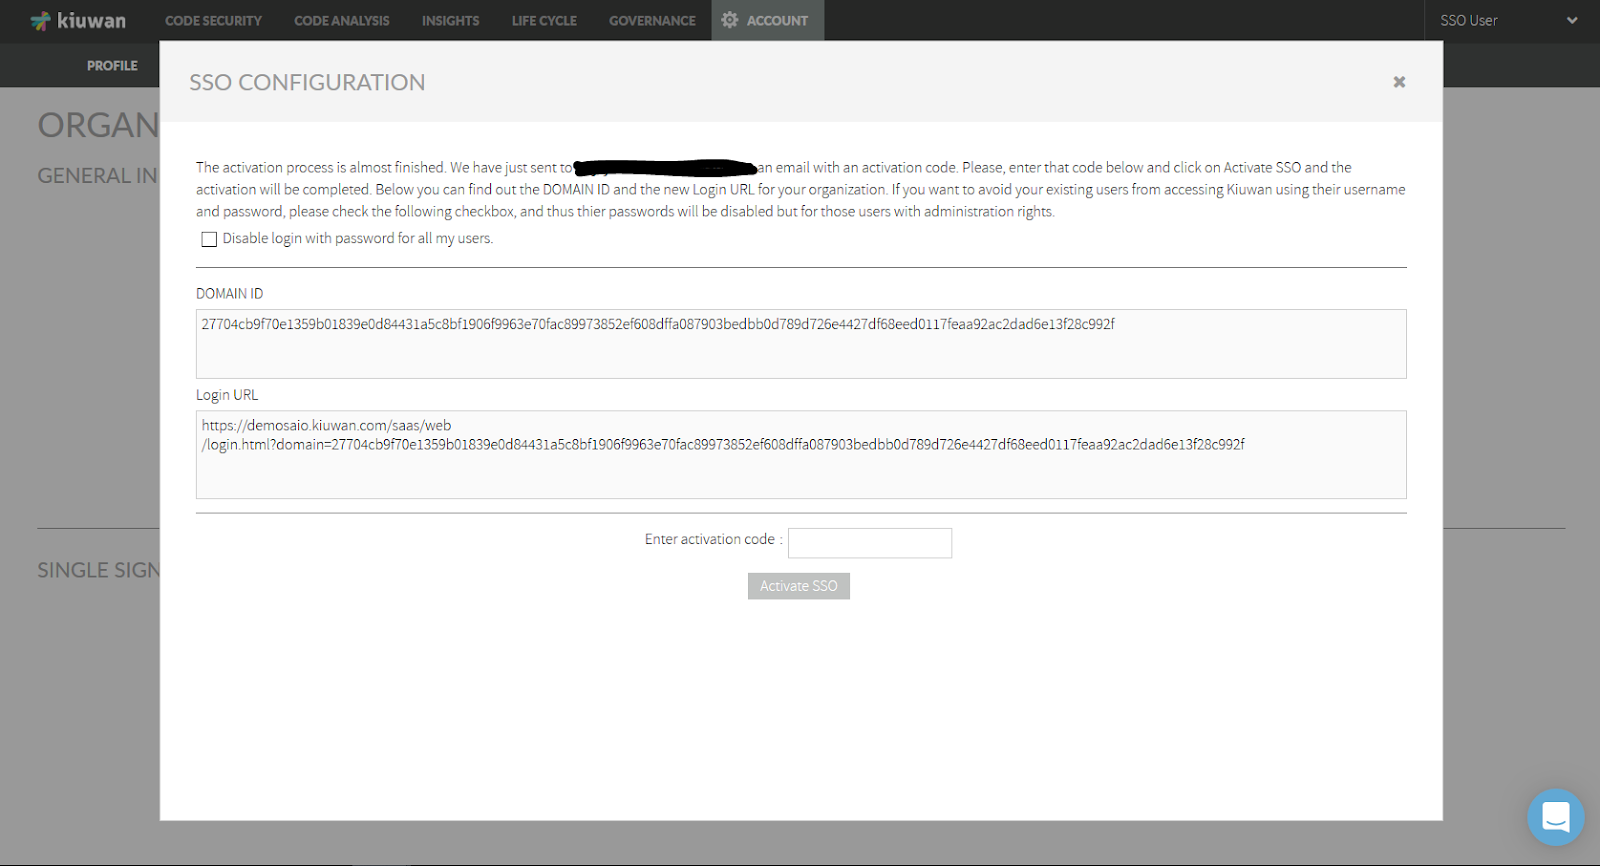

At this moment, you should have received an email with an activation code as well as Domain Id and Login URL. Enter the activation code and click Activate SSO button.Note: See How to login at Kiuwan in a Web SSO scenario on how to use the login URL.
| Info |
|---|
IMPORTANT: if your users are using Kiuwan Local Analyzer, DO NOT CHECK THIS OPTION, because all the users will be forced to use SSO. Because KLA still does not fully support SSO, if checked, you will need to manually activate user/password auth for all KLA’s users !! . Admin users can ALWAYS login both ways. Other users can be managed individually as using Kiuwan auth or SSO (see User management). |
Example mail with activation code:

After SSO activation, you will get the URL you need to configure Kiuwan as an SP in your IdP
(see section Kiuwan’s metadata configuration in ADFS here ).

Close the page and .. voilà! Your and the Kiuwan SSO configuration is done!!
In case If you further need to update existing metadata with new IdP metadata just , go to the SSO initial configuration page and click Upload a new IdP Metadata.

Click on Save to complete the update


After metadata configuration, go to Account Management > Profile and you will see the following data into in your Kiuwan account.At Account Management >> Profile you will see :

Domain ID field only only appears when your Kiuwan account is configured to use SSO.
- This ID is needed to login to your kiuwan account and it’s shared by all users of a Kiuwan account, but unique for every Kiuwan account.
Username field contains your Kiuwan username and it matches the Claim mapping (Name ID) defined in your IdP when you defined Kiuwan as Service Provider (see image above for ADFS).
Email, Name and Lastname fields are descriptive data about the user.
IdP configuration: How to configure Kiuwan as Service Provider
The IdP (Identity Provider)
so it canmust be configured to recognize Kiuwan as an SP (Service Provider).
Any SAML-compliant IdP (Active Directory FS, Azure AD, CA Single Sign-On, etc) follows its configuration method, although steps are similar.
We provide a detailed example of how to configure Active Directory Federation Services (ADFS). For other IdPs please refer to your sysadmins or product documentation.
Active Directory Federation Services (ADFS) configuration
You can use ADFS’s |
|
|
|
| |
 | 3. Then, ADFS will ask you |
about Kiuwan’s identity metadata. |
Ideally, if your ADFS can reach Kiuwan servers, you will select the first option (Import data .. online). Then you |
must provide the address |
that can be found at your Kiuwan website |
at Account Management >> Organization |
page (see image below) |

If your ADFS cannot reach the Kiuwan server, |
upload the XML metadata |
document by |
selecting Import data .. from a file. In this case, you must previously download the XML document from the KIuwan URL above. Just paste the URL in a browser that can access the Kiuwan server |
 | 4. Provide a Display name |
for Kiuwan. |
(It doesn’t have to be a domain hostname. |
)
| |
 | 5. Choose the Access Control Policy |
that will govern the access rules of your organization’s users to Kiuwan. |
6. Click Next to confirm. | |
 | 7. Review the information from the SP (relying party) and click |
| Next to finish the SP configuration in ADFS. | |
 | Notice that |
Configure claims issuance policy.. |
is checked. When checked, you will |
define how to map/transform your organization’s users to Kiuwan users. |
8. Click Close and Edit Claim Issuance Policy |
dialog will pop up |
. |
 |
| 9. Click Add Rule |
| to open Add Transform Claim Rule Wizard. |
 |
10. Select the template rule |
most adequate for your organization. In the example, we select to map |
an LDAP attribute |
 |
You can select whatever LDAP attribute that it’s unique to every user |
(i.e. the user’s email address |
) and map that attribute to the Name ID claim type. Do not select any other claim type, Kiuwan will only use Name ID. |
Kiuwan will store as a username the selected attribute value. |
After finishing, apply changes

11. Click Finish. | |
| 12. Click Apply to apply changes. |
How to
login atlog into Kiuwan in a Web SSO scenario
| Info |
|---|
The first time you log in at Kiuwan in SSO-mode, you need to specify the full URL such as:
Please note that, once SSO has been activated, the login URL must specify both SSO and domain parameters.
If you don't specify SSO, it defaults to off. |
Most commonly, in an SSO environment you will access Kiuwan from an existing link in a corporate intranet page, so the Kiuwan URL should be changed to it and you will not need to type manually such URL.
Anyway, once you have successfully accessed Kiuwan for the first time, your browser will store the domain id, so you can just type https://www.kiuwan.com and everything will work.
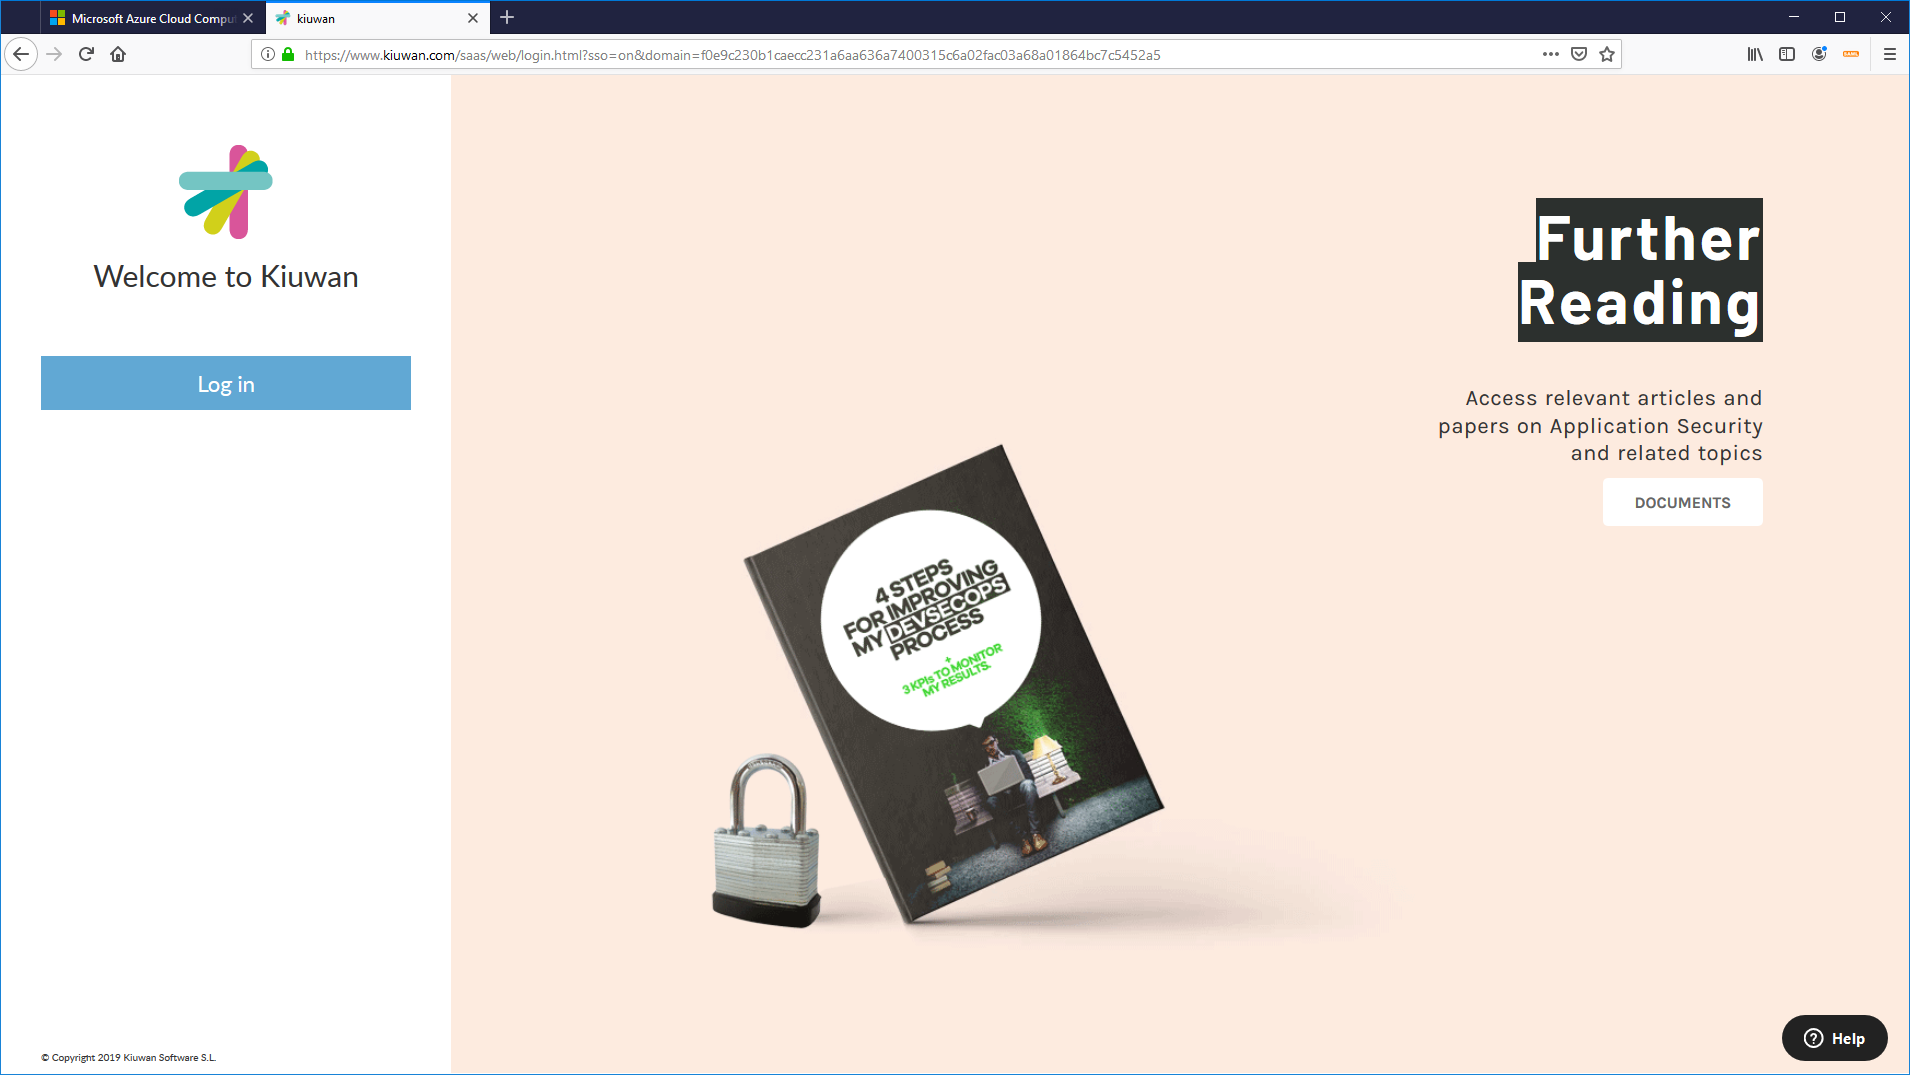
Then, the Kiuwan SSO Login page will be displayed.

Just click Log In and the SSO-SAML protocol will be activated.
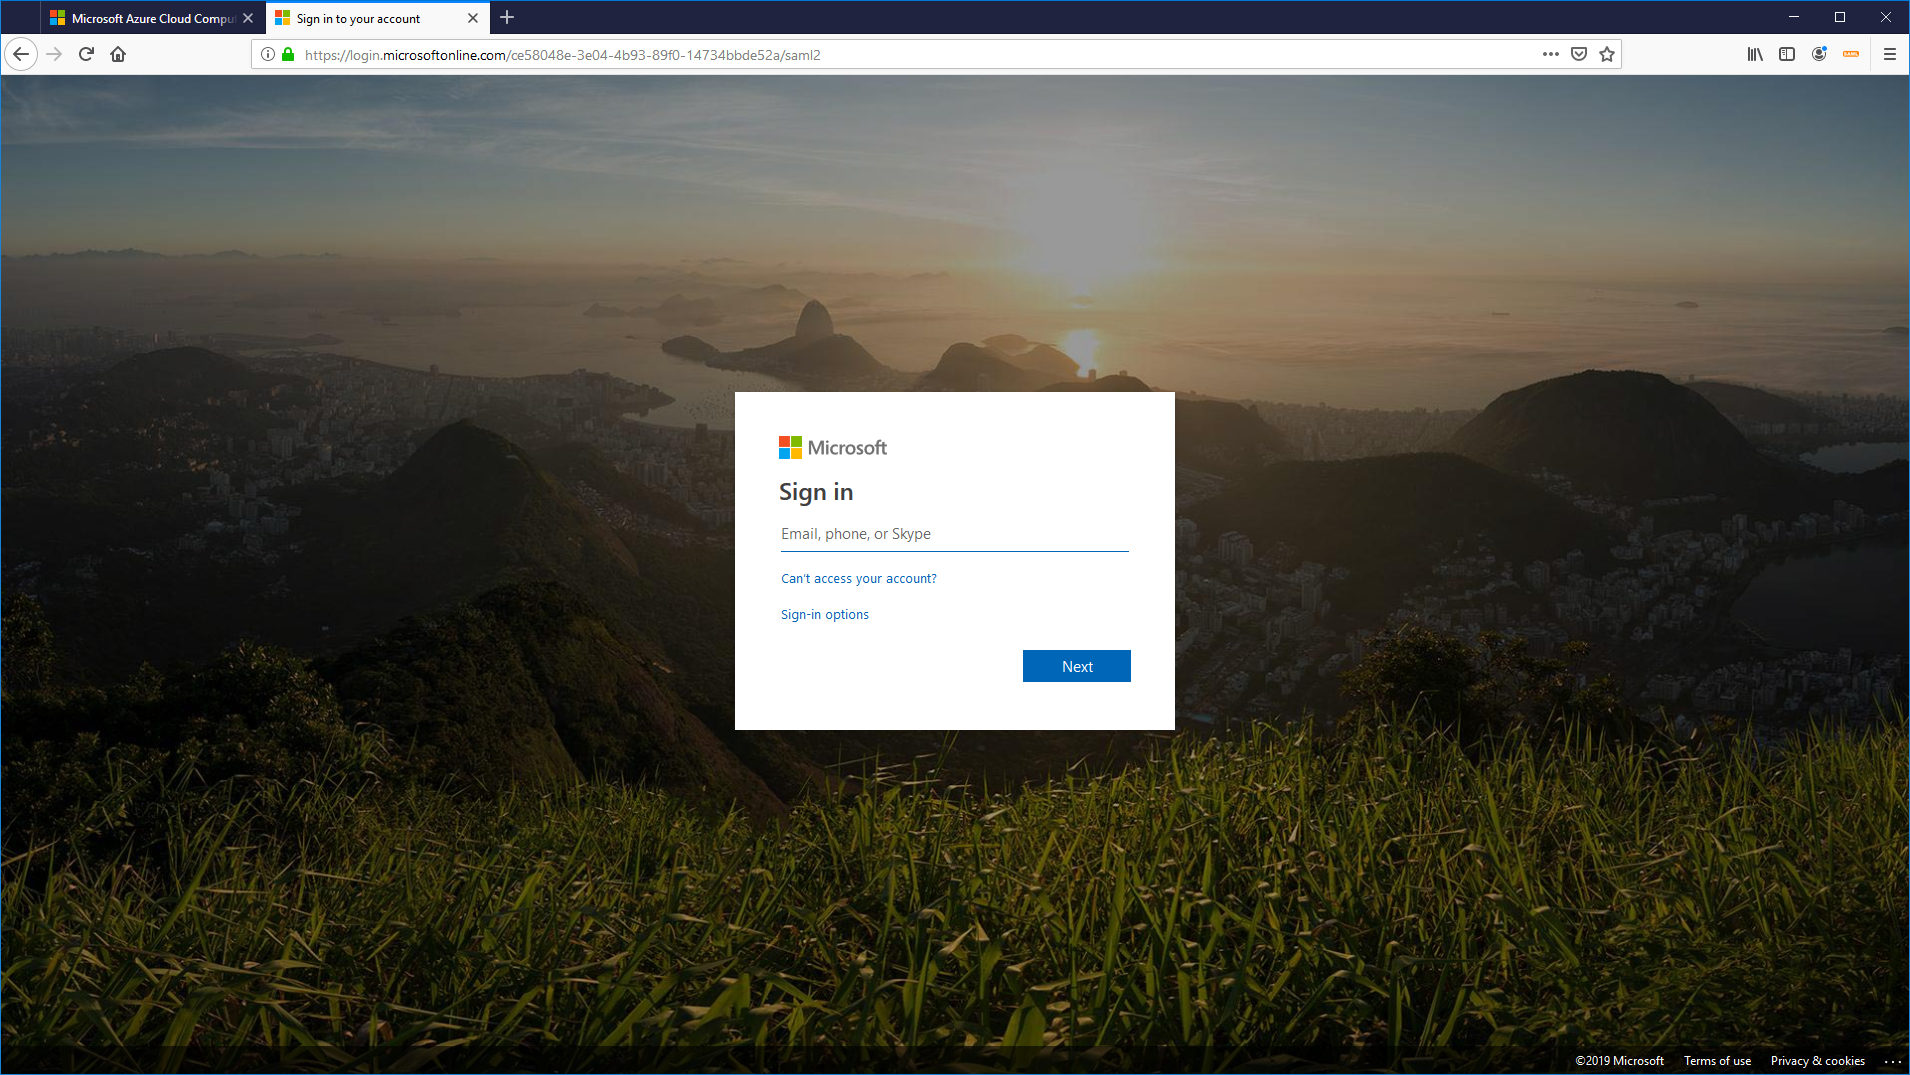
- If you were already successfully authenticated, you will log in to Kiuwan.
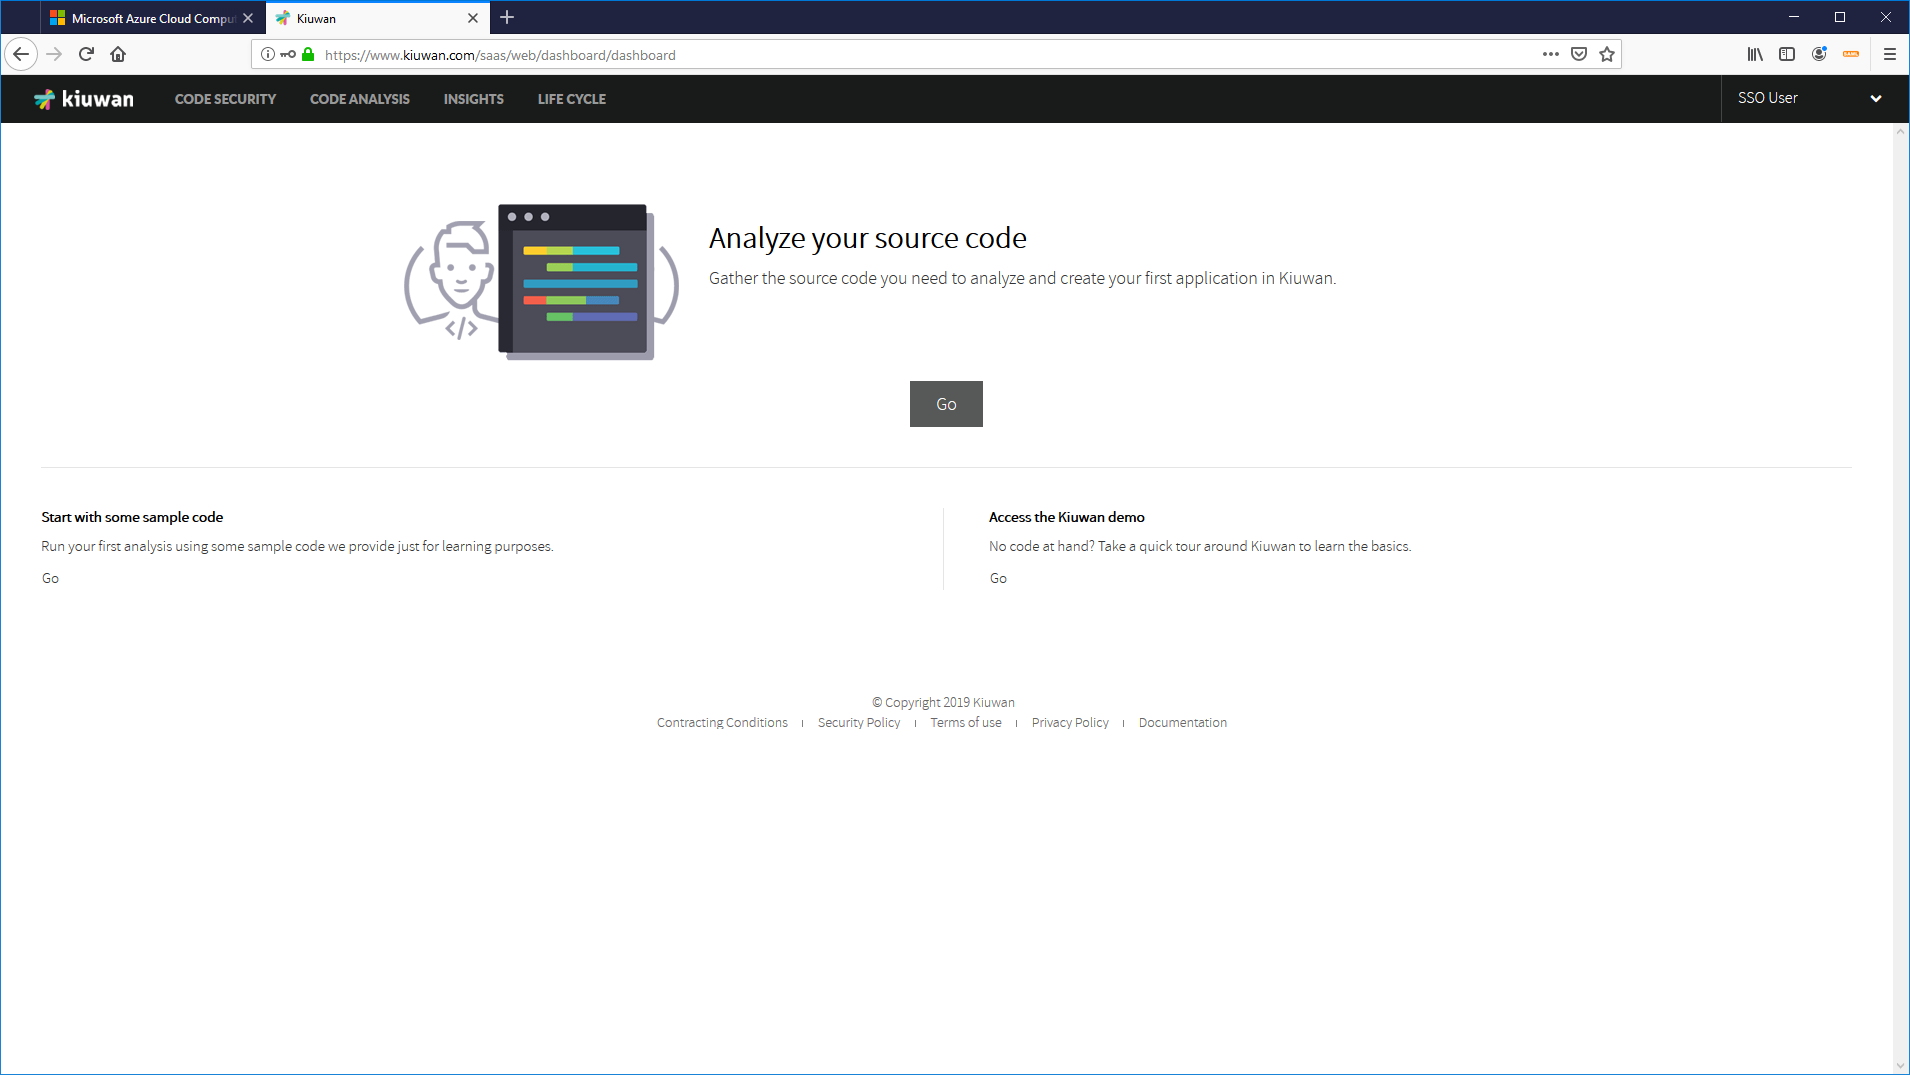
- If not, you will be redirected to your organizational authentication page. Once authenticated, you will be redirected to the Kiuwan dashboard.
An alternative method to login to Kiuwan is from your IdP.
If you are using ADF, you will find a URL like this: https://<your_idp_hostname>/adfs/ls/idpInitiatedsignon.htm

Just select the site (the Display Name defined at your IdP), you will be asked for your credentials and will be redirected to the Kiuwan dashboard!!
How to configure Kiuwan clients to work with SSO - SAML
| Info |
|---|
After configuring SSO, your web users can immediately log in to the Kiuwan website using the new login URL. But, Kiuwan “clients” (i.e. Kiuwan Local Analyzer, Kiuwan 4 Developers, and any custom program using Kiuwan REST-API) need to be configured to use SSO. |
Kiuwan Local Analyzer (KLA): SSO configuration
| Infowarning |
|---|
Once SSO is configured, it's mandatory to configure KLA with the SSO Domain ID. Otherwise, KLA will stop to workworking!!
Nevertheless, KLA will still use user/password configuration (a new KLA with SSO authentication will be released shortly). |
In summary, after the SSO activation:
Configure KLA with SSO Domain ID
Be sure KLA users are allowed to use username/password authentication
KLA’s SSO Domain ID configuration can be done in three different ways:First, by
- By using KLA GUI as the image shows:

- By modifying the agent.properties file:
- set domain.id property to your domain id
- Additionally, if you are using KLA CLI you can also specify the domain.id property as a command-line parameter.
Kiuwan for Developers (K4D): SSO configuration
info
Similarly to KLA SSO configuration, K4D also needs to be configured with the Domain ID
Go to your IDE’s Kiuwan configuration, select Connection Properties
>>> Single Sign-On
section/taband enter your Domain ID.

REST-API: SSO configuration
For custom programs using Kiuwan REST-API calls, you have to add a new header (X-KW-CORPORATE-DOMAIN-ID) to indicate the Domain ID to pass the BASIC authentication.
For example:
curl -H "X-KW-CORPORATE-DOMAIN-ID: {domain.id}" -u {username}:{password} https://api.kiuwan.com/info
SSO login vs username-password login
When a Kiuwan account is converted to SSO-enabled, by default, all existing users :
- They must use the new login URL (see How to login at Kiuwan in a Web SSO scenario )
- Previous URL login (https://www.kiuwan.com/saas/web/login.html) will not work anymore
- Usernames and permissions are entirely preserved
- Only the authentication mechanism has changed. Usernames Usernames, assigned roles, permissions, user groups, etc are maintained.
- By default, existing users (not admins) are not allowed to log in to kiuwan using former Kiuwan's password
- They will be authenticated by the configured identity provider (IdP), not by Kiuwan.
Nevertheless, you might want certain users to being authenticated also by Kiuwan, i,e, some user might choose to authenticate either by SSO or by Kiuwan.
The Kiuwan admin can enable username-password access through the User Administration page, enabling Login with password enabled to selected users
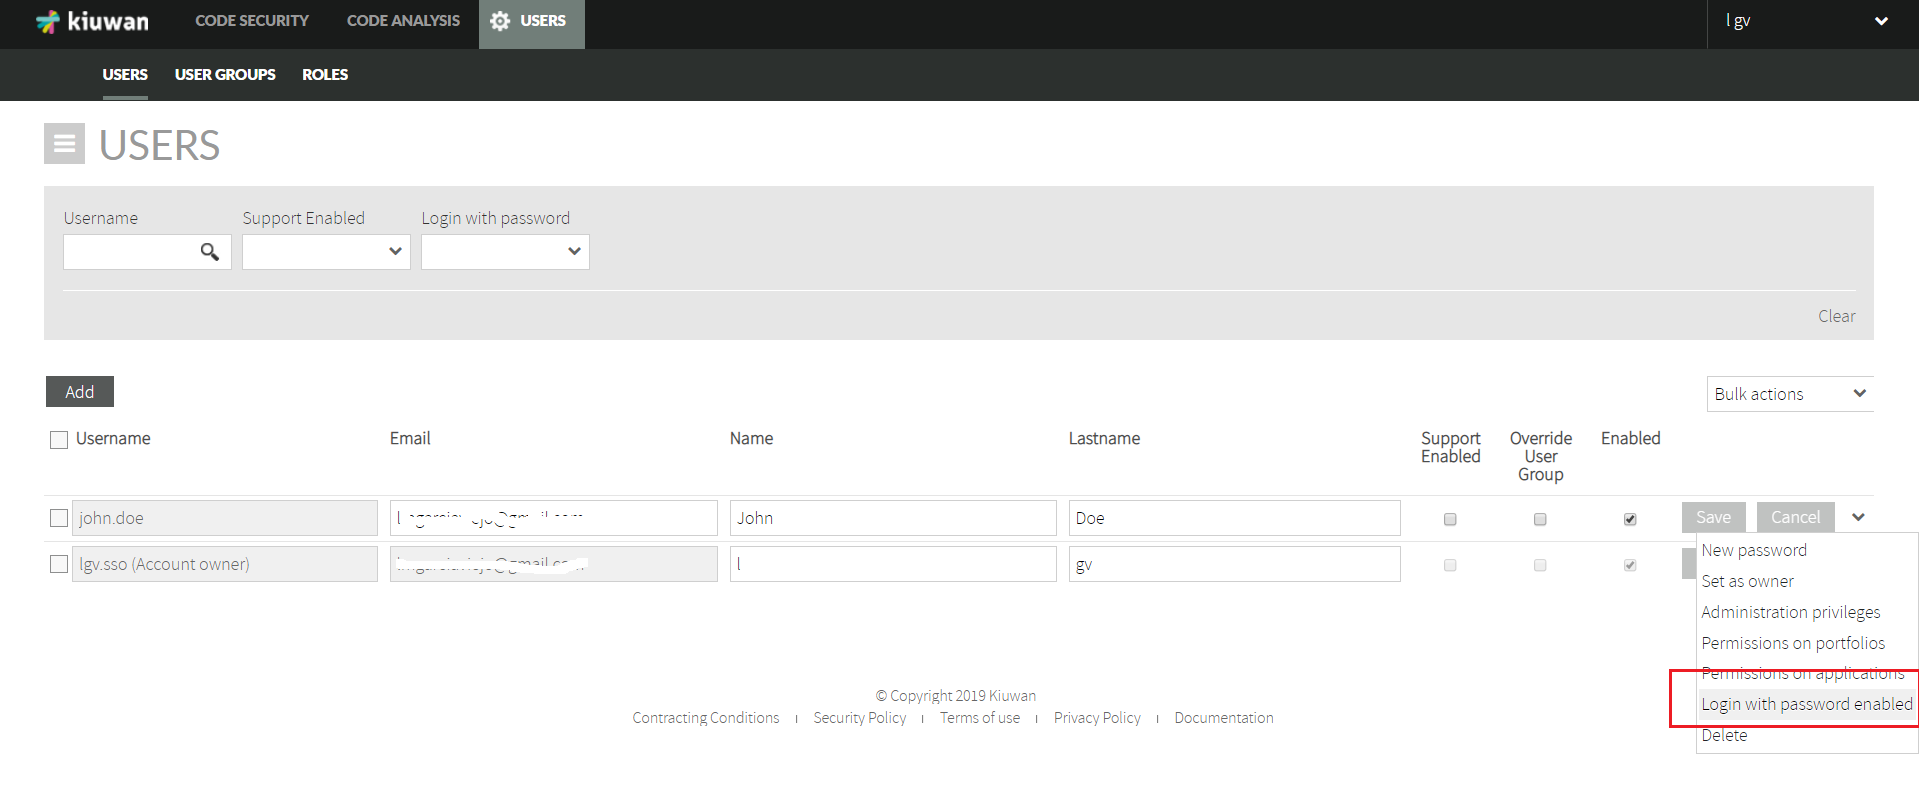
| Info |
|---|
Users with privilege "Login with password enabled" can then login to Kiuwan in two ways:
|
Adding a new user in an SSO-enabled account
In an SSO-enabled account, when you create a new user user, you can decide if that user can access Kiuwan with a password password (besides SSO).
Just check check the Enable login with password option at in the New User page and , of course, click on Generate password to let him/her know ![]() know.
know.
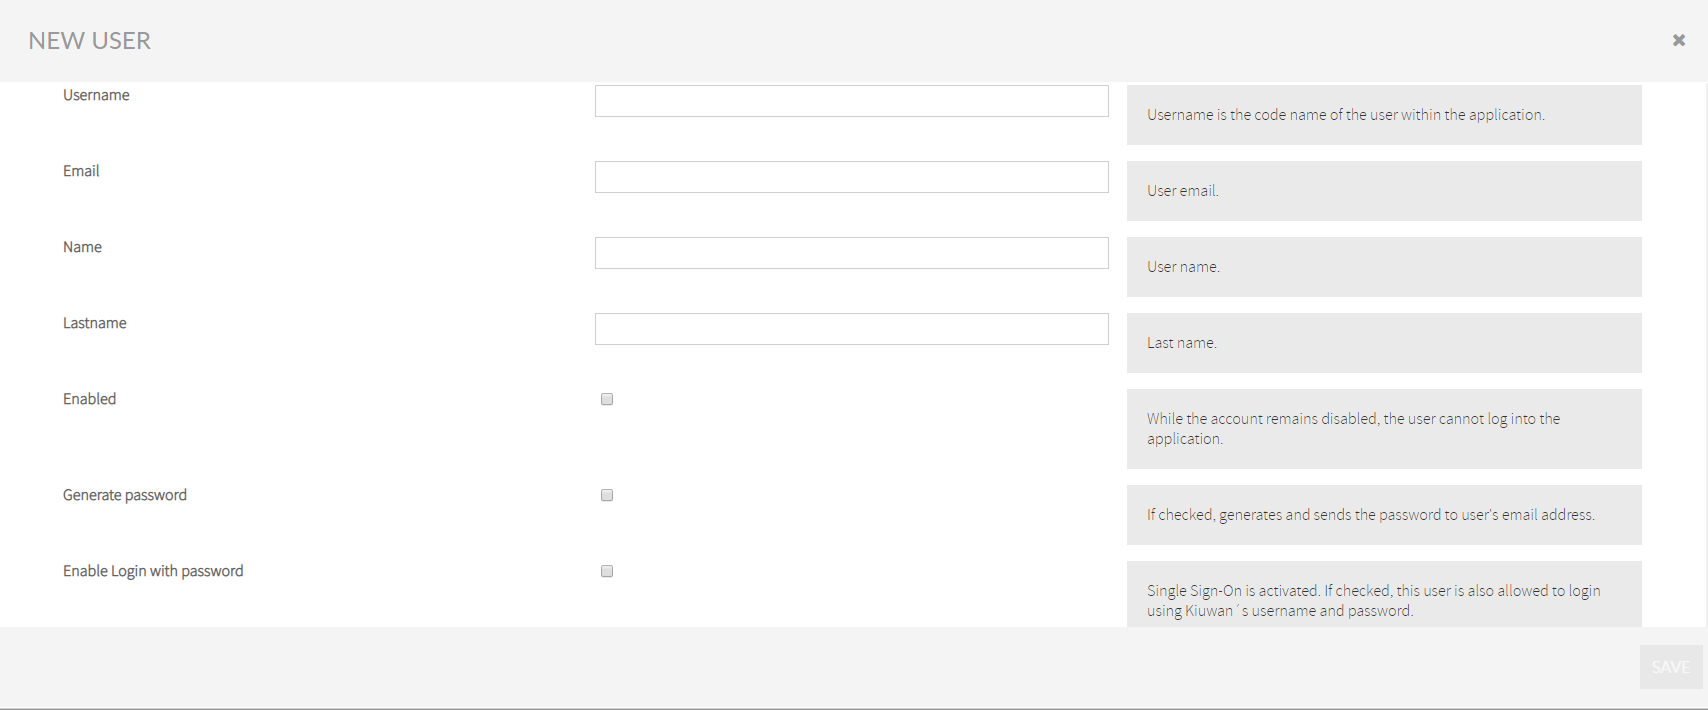
Do not click on Generating password and not Enable Login with a password, that password would be useless (...)
Appendix - Azure Active Directory configuration: How to configure Kiuwan
Appendix - Azure Active Directory configuration: How to configure Kiuwan as Service Provider
You must configure your Idp (Azure AD) so it recognizes Kiuwan as an SP (Service Provider).
In Azure AD, you should create an Enterprise Application (Kiuwan SSO, in this example).To do it, select
- Select Azure Active Directory >> Enterprise applications

- Click on New application
- .
- Select Non-gallery application and fill in the app name (Kiuwan SSO in our example) and click Add

- .

- When created, you will see a page like this.
- Next,

- add users that will be allowed to log in to the Kiuwan SSO application.
- Select the users from your Azure Active Directory that will be allowed to log in to the Kiuwan SSO application.


- Now that some user has been added,

- configure the Single sign-on
- .

- Export the Azure Active Directory metadata and import it to Kiuwan.
To export AAD metadata, click on the Download link at Federation Metadata XML.

| Info |
|---|
Downloaded The downloaded XML file needs to be imported into your Kiuwan account, as as shown before. After importing AAD metadata into Kiuwan, your Kiuwan account will be ready to generate its metadata that you will import into AAD. |
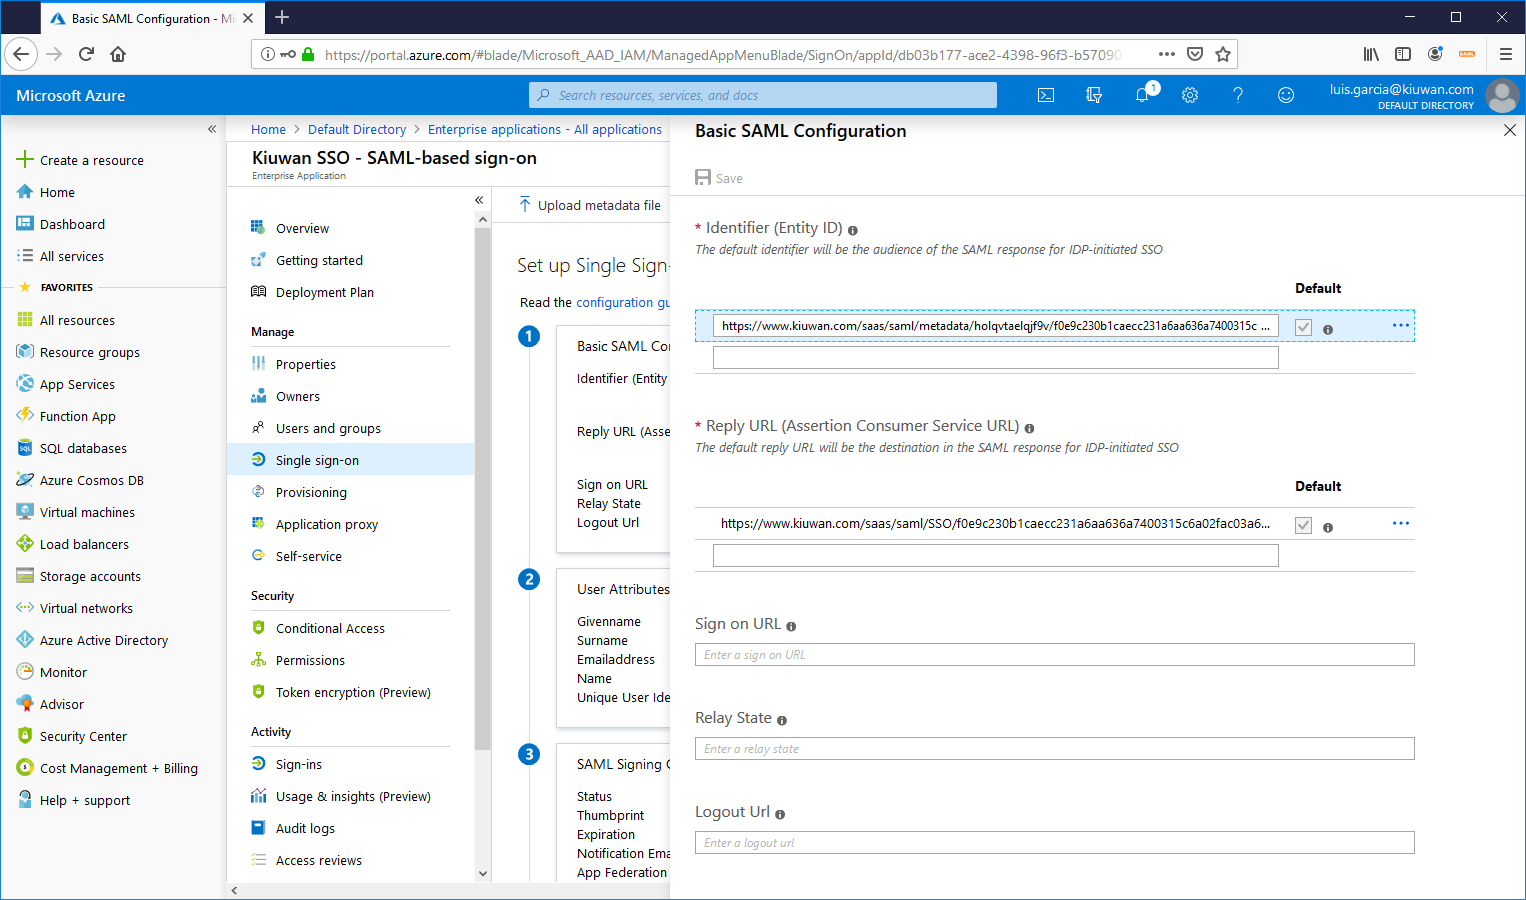
1. To export Kiuwan metadata, go to Account Management >> > Organization and you will see the URL to download Kiuwan metadata.

Just type 2. Type the URL in a browser and save the content as an XML file.

1. Now,
you canimport (upload) the Kiuwan metadata XML file into AAD.

Once 2. Once uploaded, click Save.
3. Once done, you need to click on User Attributes & Claims to set your Claims policy. To do it, click on User Attributes & Claims

Select 4. Select the Name identifier value

value and set up the policy on how to manage your ADA usernames to Kiuwan usernames.
5. In this example, we take the first part of the email.
For example, an AAD user with email john.doe@domain.com will be mapped to john.doe when sent to Kiuwan.

6. Now, you can test click Test to test Single Sign-On with the Kiuwan SSO app. Just click on the Test buttonwith the Kiuwan SSO app.

7. Select the user (the current one or someone else)

8. Because you are already logged in ADD (and therefore authenticated) you you will be forwarded directly to the Kiuwan app.

9. Login from the Kiuwan site
Login from the Kiuwan site